
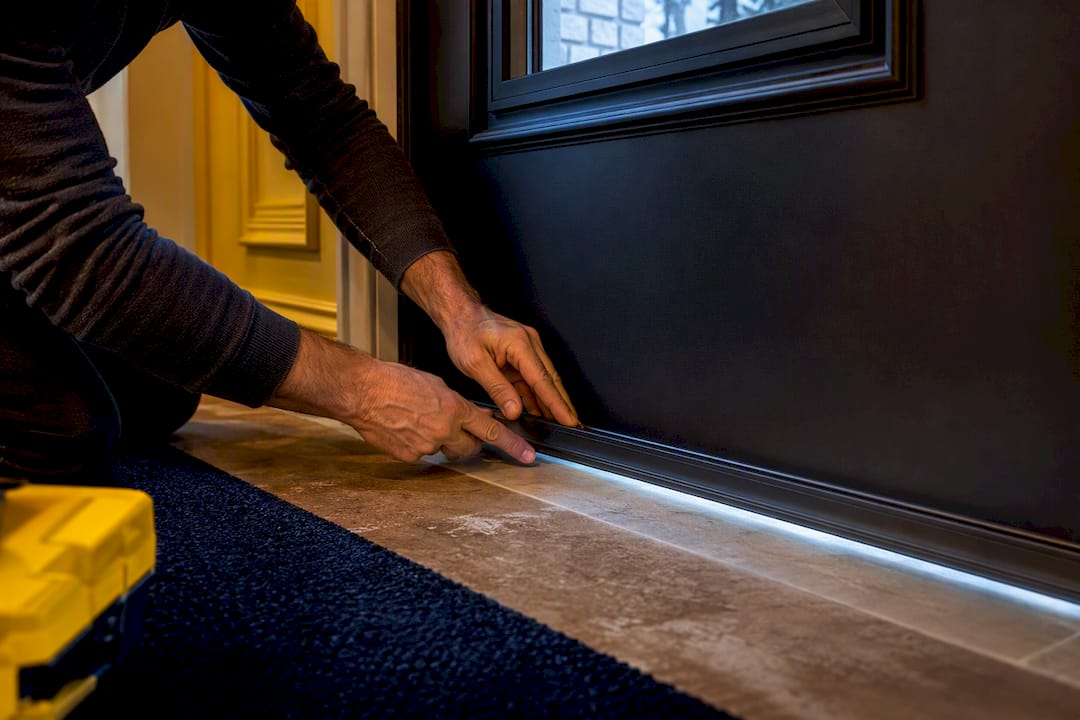
Most front door air leak problems come down to worn weatherstripping or a gapped threshold, and you can fix both yourself in an afternoon. Grab a sheet of paper or a lit incense stick and run it along the door’s perimeter right now. If the paper slides out easily or the smoke bends sideways, you’ve found a gap. Uneven gaps at the corners, a sagging door, or a soft, spongy jamb are different problems. Those need a professional set of eyes, and that’s where a crew like Kettlecontracting comes in.
TL;DR:
- Replacing weatherstripping every 3 to 5 years and using durable seals like kerf-in silicone bulb gaskets is essential for long-term winter performance.
- Weatherstripping suits moving gaps while caulk is for stationary joints; mixing these up is the primary cause of poor sealing and frequent rework.
- Structural issues such as soft, rotting jambs or a door that drags require professional assessment and repair before sealing efforts, especially in cold climates.
- Use a paper test and incense smoke to accurately locate leaks, especially around thresholds and jambs, before choosing the appropriate fix.
- Proper surface prep, fixing door alignment, and selecting the right material matter more than brand or product choice in achieving durable, lasting seals.
Table of Contents
- How to find where the air is coming from
- DIY fixes that stop most front-door drafts
- When to hire a contractor and what pro sealing looks like
- Kettle Contracting trade tips for durable sealing in cold climates
- Cost estimates for common DIY fixes and professional repairs
- What actually matters more than the product you buy
- Get a durable, freeze-proof seal on your front door
- Sources
- FAQ
How to find where the air is coming from
You don’t need fancy equipment to track down a front door air leak. You need a quiet afternoon, a sheet of paper, and maybe an incense stick from the dollar store.
Here’s the sequence we use on job sites, adapted for a homeowner working solo:
- Run the paper test first. Close the door on a piece of paper at various points along the frame. If you can pull it out without resistance, that section isn’t sealing.
- Follow up with an incense stick. Light it, hold it a couple of centimetres from the frame, and watch the smoke. A steady flame that suddenly flickers or bends sideways means air is moving through that spot. Keep it away from curtains or anything flammable, obviously.
- Exaggerate the leak. Shut the windows, turn on your kitchen range hood or the bathroom exhaust fan, and let the house depressurize for a minute. This pulls outside air in through every weak point, making leaks easier to feel and hear.
- Work the priority zones in order: the threshold and sweep, both jambs, the head (top of the frame), the hinge side, the mail slot if you’ve got one, and the trim where the frame meets the wall.
- Mark and photograph everything. A strip of masking tape and a phone photo at each leak point saves you from re-testing later. Rate each one loosely: minor draft, noticeable draft, or “you can feel the wind.”
Natural Resources Canada’s guidance points to windows and doors as the logical starting point for any air-sealing project, and lists these same locations as the common failure points around an entry door. SaveOnEnergy’s simple paper test is the same trick we’ve been showing homeowners for 25 years. It’s low tech, but it works.
DIY fixes that stop most front-door drafts
Once you know where the air’s getting in, the fix usually falls into one of two camps: weatherstripping for anything that moves, or caulk for anything that doesn’t. Mixing those up is the single most common mistake we see on service calls.
Match the weatherstripping to the gap:
- V-strip (tension seal) for jambs and the head, where the door swings past a flat surface.
- Compression seals for door stops that sit snug against the slab when closed.
- Pile or brush seals for spots with sliding contact, like the bottom of a door that drags slightly.
- Foam tape only for small, irregular gaps, and know that it’s the shortest-lived option in a Canadian winter.
Before you install anything, strip the old material off completely. Old adhesive residue left behind stops new strips from bonding, and in cold weather that adhesive gets brittle and pulls off in chunks rather than a clean peel. Clean the surface with mineral spirits or warm soapy water, then let it dry fully. Adhesive-backed products need a surface above roughly 10°C to bond properly, so if you’re doing this job in a Canadian December, warm the frame with a hair dryer first or wait for a milder day.
For the bottom of the door, you’ve got three common options:
- Screw-on door sweeps are the cheapest and easiest for a flat, level threshold.
- Adjustable thresholds let you raise or lower the sill slightly to close a gap that’s opened up as the house has settled.
- Automatic drop-down sweeps retract when the door opens and drop into place when it closes, which is worth it on a door that drags on carpet or an uneven mat.
Caulk belongs where the frame meets the wall, house wrap, or brick. It never belongs on the door stop or anywhere the door itself moves against. Caulking a moving joint just means you’re scraping it off and redoing it every season. Use an exterior-grade silicone or polyurethane sealant, and for gaps wider than about 6 millimetres, pack in a foam backer rod first so you’re not trying to bridge open air with caulk alone. Our own guide to caulking around door thresholds walks through the exact bead technique we use on job sites.
Pro Tip: If your door doesn’t close square in the frame, don’t try to solve it with a thicker weatherstrip. Piling foam onto a misaligned door just makes it harder to latch and wears out twice as fast. Fix the alignment first, then seal.
When to hire a contractor and what pro sealing looks like
Some front door air leaks aren’t a weatherstripping problem at all. They’re a structural one, and no amount of foam tape fixes a jamb that’s rotting from the inside.
Call in a pro when you see:
- Gaps that are wider at one corner than the other (the door or frame has shifted)
- A door that’s started sagging or dragging on the mat
- Soft, discoloured, or spongy wood at the sill or jamb
- A threshold that’s cracked, warped, or won’t sit flat anymore
A competent contractor does more than slap on new weatherstripping. Expect hinge and strike plate adjustment to get the door sitting square again, threshold replacement, kerf-in seals cut directly into the frame for a cleaner and longer-lasting fit, and trade-grade silicone bulb seals rather than the foam strips sold at the hardware store. If there’s rot involved, that means frame repair and proper flashing before any sealant goes near the joint. Skipping that step and just caulking over rotten wood is one of the most common patch jobs we get called to redo.
For larger retrofits beyond a single door, a blower door test gives a full picture of where a house is losing air, but it’s genuinely overkill for one drafty entry. Save that for whole-home energy audits. Fall is the best window for this kind of work, since caulk and sealant need dry, moderate temperatures to cure and bond properly before the freeze sets in. Book it before November if you can.
Kettle Contracting trade tips for durable sealing in cold climates
Cheap adhesive foam tape looks fine in October and starts peeling by February. That’s not bad luck. Adhesive bonds get brittle and lose grip through repeated freeze-thaw cycles, which is exactly what an Ontario winter puts a front door through, week after week. Mechanically fastened seals and kerf-mounted silicone bulb gaskets hold up far better because they’re not relying on glue to survive the swelling and shrinking of a wood or steel frame.
When we inspect a door, we’re probing the jamb and sill with a screwdriver tip, feeling for soft spots that indicate hidden rot before it shows on the surface.
A door that looks fine from three feet away can still have a jamb that’s gone soft underneath the paint. That’s the stuff a homeowner’s eye walks right past, and it’s exactly what turns a $40 weatherstrip job into a $400 frame repair if it sits untreated for another season.
Plan on a pre-winter check every fall, and expect to replace standard weatherstripping every 3 to 5 years, with better silicone bulb seals stretching closer to 7 years before they need attention. Our cold-climate caulking guide covers the maintenance rhythm in more detail.
Cost estimates for common DIY fixes and professional repairs
A weatherstripping kit runs somewhere in the $15 to $40 range depending on material, and a decent door sweep or adjustable threshold adds another $20 to $60. A tube of quality exterior-grade silicone caulk with a backer rod costs under $20. For most homeowners, a full DIY re-seal of a front door, weatherstripping, sweep, and a caulk bead around the frame, sits comfortably under $150 in materials, plus an afternoon of labour.
Professional work costs more because it fixes more than the surface. A straightforward weatherstripping and caulking service call is going to run less than a job that involves threshold replacement or frame repair, simply because of the extra materials and time involved. If rot has gotten into the jamb or sill, you’re looking at carpentry work on top of the sealing, and that price climbs accordingly. The honest answer is that cost depends heavily on what’s actually wrong, which is exactly why a proper diagnosis before quoting matters more than a flat number ever could.

Moisture that’s been getting past a failed seal for a season or two can also invite mould growth inside the wall cavity, something worth checking with a home air quality checklist if you notice a musty smell near the entry. That’s a cost multiplier nobody wants to discover after the fact.
What actually matters more than the product you buy
The industry loves to sell homeowners on which weatherstrip brand or which caulk tube performs best. That’s the wrong question. The material matters far less than whether the door is square, the surface was prepped properly, and the right product went in the right spot. I’ve seen premium silicone bulb seals fail within a year because they were slapped onto a door that was already dragging, and I’ve seen a $12 foam strip outlast expectations because the install was done right on a properly aligned frame.
Where conventional advice falls short is treating every front door air leak like a weatherstripping problem. Plenty of them are structural, and no amount of product swapping fixes a jamb that’s already rotting. If you take one thing from this, prioritize diagnosis over shopping. Run the paper test, find your actual leak points, and only then decide whether it’s a Saturday afternoon job or a call to a contractor.
— Felix
Get a durable, freeze-proof seal on your front door
A weekend of weatherstripping fixes plenty of drafts, but it won’t fix a rotting jamb, an out-of-square frame, or a threshold that’s already cracked. That’s the gap between hardware-store fixes and work built to survive an Ontario winter. Kettlecontracting brings trade-grade materials, kerf-in seals, and proper frame repair to jobs that DIY strips can’t touch, and we sequence every job so caulk and weatherstripping actually work together instead of fighting each other.

If your paper test turned up uneven gaps, a sagging door, or soft wood at the sill, that’s not a weekend project anymore. Read why caulking is trade-specific work to understand what separates a lasting seal from a patch job, then get in touch with our Oshawa-based crew for an assessment. We’ll tell you straight whether you’re looking at a quick fix or a frame repair, and quote it honestly either way.
Sources
- Air sealing | Gouvernement du Québec
- Comprehensive air leakage control — Natural Resources Canada
- Air leaks: What you need to know — Saveonenergy
FAQ
My front door is leaking air. How can I fix it?
Run a paper or incense test to find the exact gap, then replace worn weatherstripping and add or adjust a door sweep. If the gap is uneven at the corners or the jamb feels soft, the frame likely needs professional repair rather than a DIY patch.
Is it normal for cold air to come through the front door?
A small amount of air exchange is normal, but a noticeable draft you can feel on your hand means the seal has failed somewhere. Provincial guidance confirms doors and windows are a major source of winter heat loss when seals wear out.
How do I stop wind from coming through my front door?
Seal the moving joints with the right weatherstripping type for that gap (V-strip, compression, or pile), and caulk any stationary gaps where the frame meets the wall. Never caulk the door stop itself, since that joint needs to move.
How do I fix a door that lets air in?
Test the full perimeter first to map every leak point, then work through weatherstripping, a door sweep or adjustable threshold, and frame caulking in that order. If the door is sagging or won’t sit square in the frame, that alignment issue needs fixing before any sealant goes on, and it’s often worth a call to a contractor like Kettlecontracting.
