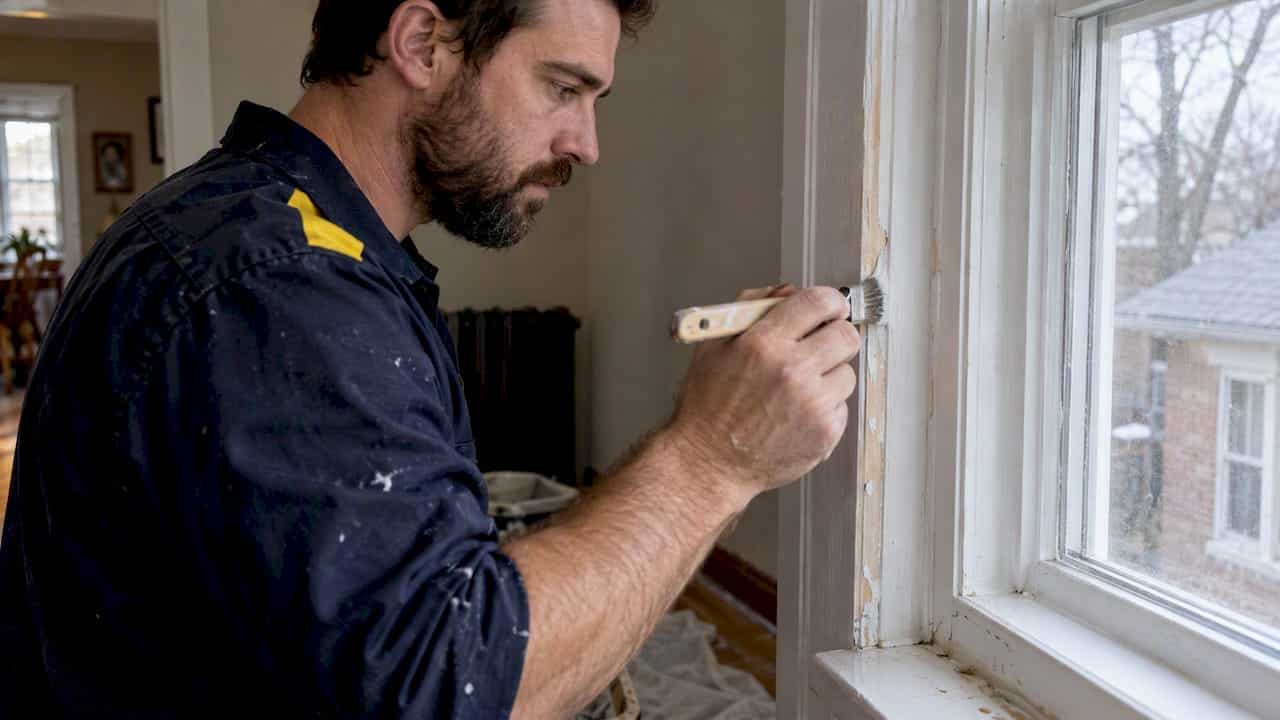
For a painting job, the standard order is prime, caulk, then paint. Priming first gives the caulk a sealed, even surface to grab, and it makes gaps easier to spot. For a sealant joint on a building exterior (windows, doors, brick, concrete), the answer is different. Most construction sealants are made to bond to clean, dry surfaces without a primer, and a primer is the exception, not the rule.
Those are two different jobs that people mix up, and that is why the advice online contradicts itself. Below we sort out which one you have, what order to work in, and how long to wait between steps in an Ontario climate.
TL;DR
- Painting trim, walls or panelling: prime bare surfaces first, caulk the gaps, let the caulk cure fully, then paint.
- Exterior sealant joints (windows, doors, masonry): most polyurethane and silicone sealants are designed to bond without a primer to clean, dry, sound surfaces. Prime only when the manufacturer or a test joint says so.
- Always test: a small test joint on the real surface tells you more than any rule of thumb.
- Timing matters: a primer that needs a sealant window has one. Miss it and you can lose adhesion. Paint over uncured caulk and it can crack.
- Ontario winters are hard on shortcuts: the joint moves with the freeze-thaw cycle, so adhesion has to be right the first time.
Table of Contents
- First, which kind of caulking job do you have?
- Painting jobs: prime, caulk, then paint
- Exterior sealant joints: usually no primer
- When a primer is needed
- Timing: how long between primer and sealant
- Ontario conditions change the answer
- How to test whether you need a primer
- Common mistakes
- Our perspective: what 25 years of Ontario joints taught us
- When to call a professional
- FAQ
- Sources
First, which kind of caulking job do you have?
On site, we ask this before anything else, because the answer decides the order of work.
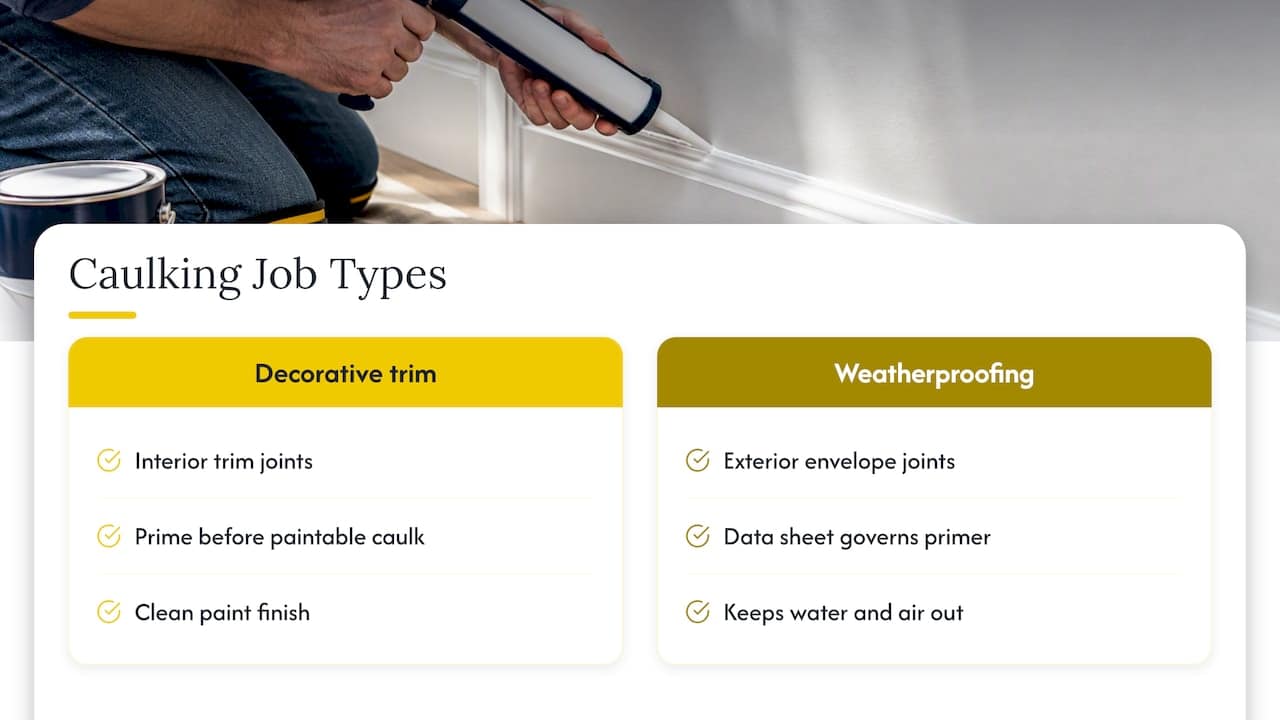
Decorative caulking is the paintable caulk you run along baseboards, window casings, crown moulding and panel seams before the final coat. It fills small gaps so the paint finish looks clean. Here, priming first is standard practice.
Weatherproofing sealant is the joint that keeps water and air out: around window frames, door frames, brick expansion joints, and between different materials on a building envelope. It has to stretch and compress through temperature swings for years. Here, the manufacturer’s data sheet rules, and a primer is often not part of the system at all.
If you are not sure which one you are looking at, ask where the joint sits. A gap between interior trim and a wall is decorative. A gap between a window frame and brick or siding is a weatherproofing joint, even if it is also painted.
Painting jobs: prime, caulk, then paint
On a painted surface, the sequence most trades follow is straightforward: prime the bare or patched surface, fill the joints with caulk, then apply the topcoat. Sherwin-Williams’ product data for its Loxon concrete and masonry primer-sealer is one example of a manufacturer describing this approach, with the primer sealing the surface so what goes on top bonds to a stable base instead of raw, dusty material.
Here is why we work this way:
- Better adhesion. Caulk grips sealed primer better than bare drywall paper, raw wood or dusty plaster.
- Fewer flashing and sheen problems. Bare porous surfaces soak up moisture from the caulk and paint unevenly. Primer evens that out.
- You can see what needs filling. Once a surface is primed, small gaps and cracks show up clearly. On raw surfaces they hide.
- End cuts and edges are sealed. On new exterior wood trim, cut ends should be primed before installation, then caulked once the piece is in place.
There is a fair counter-argument you will see in forums: some painters caulk first, then prime and paint over everything in one go. That can work on interior drywall seams with a good paintable caulk, and it saves a step. We still prefer priming first on anything bare, because we have seen caulk lift at the edges on raw wood and unprimed patches. If you do caulk before priming, choose a caulk labelled as paintable and primable, and confirm the primer is compatible.
For a deeper look at sequencing in an Ontario setting, see our guide to caulking before painting. If your question is about the order of the surfaces themselves, we cover whether to paint the wall or the trim first separately.
Let the caulk cure before you paint
This is where most paint failures start. Benjamin Moore’s guidance on painting trim is to make sure caulk is fully cured per the label before painting, because painting over wet or uncured caulk can cause cracking and surface defects.
The label is the authority here. A fast-drying acrylic latex caulk and a siliconized product do not have the same schedule, and a cold, damp room slows everything. If the caulk still feels soft or tacky, or skins over but is wet underneath, wait.
A related point on interior work: Benjamin Moore notes in its panelling guide that caulk is a better choice than spackling compound at seams between trim and walls, because it flexes with shifting materials while spackle tends to develop hairline cracks.
If you are repainting before a sale, the order of work matters even more, since buyers and inspectors notice split caulk lines. A local painting before selling guide for Bowmanville covers the sale-prep side of painting in our area.
Exterior sealant joints: usually no primer
This is the part most guides skip. On windows, doors, brick and concrete, the sealant is a construction product with its own substrate rules.
Sika’s technical data for Sikaflex NP-1 is typical of what you read in manufacturer data: standard polyurethane and silicone sealants are generally used without a primer on most construction materials, and are formulated to bond directly to clean, dry substrates such as concrete, wood and metal. Priming is typically reserved for special cases: dusty, oxidized or very porous surfaces, or joints that will be immersed in water after curing.
DAP’s data sheet for its polyurethane construction sealant lists a wide range of compatible materials, including wood, aluminum, vinyl, PVC trim board, glass, stucco, brick, stone, concrete and mortar, and gives an application range of 4.4°C to 37°C. DAP also recommends testing a joint on the actual project surface to find out whether that surface needs a primer, since porosity and past contamination vary even within one building.
That test-first approach is the one we follow. Read on for how.
What clean really means
Skipping the primer only works if the surface is properly prepared. Sika’s Sikaflex-1A product page states that joint surfaces must be clean, sound and frost-free, and that joint walls must be free of oils, tar, asphalt, bitumen, grease, paints, coatings, sealers, curing compound residues and other foreign matter that could hurt adhesion.
In practice that means:
- Remove all the old sealant, not just the loose top layer. New sealant does not bond well to old silicone residue.
- Brush or vacuum out dust and crumbled mortar.
- Wipe metal or glass with the cleaner the sealant maker specifies.
- Make sure the joint is dry, and not frosted.
Our own guides on preparing windows for caulking and on the biggest mistakes people make when caulking windows go through this step by step. Poor prep is behind more failed joints than the wrong product is.
When a primer is needed
A primer is an adhesion promoter. It is added when the surface alone will not give the sealant a reliable bond. The usual cases:
| Situation | Primer? | Why |
|---|---|---|
| Clean wood, aluminum, vinyl, glass with a standard sealant | Usually no | Sealant is formulated to bond directly |
| Dusty, chalky or oxidized surfaces you cannot fully clean | Often yes | A stable base is needed |
| Highly porous masonry or concrete block | Often yes, or a scratch coat | Prevents trapped air and moisture from causing defects |
| Joints in constant water contact | Often yes | Manufacturers reserve primers for immersion service |
| Specific sealants, such as polysulphide on concrete or metal | Yes, per the data sheet | Sealant system is designed with its own primer |
| Painted or coated surfaces | Test first | Sealant may bond to the coating, not the building |
A good example of a system that requires one: Sika’s Duoflex Primer-5050 is a two-component epoxy primer that promotes adhesion of Duoflex polysulphide sealants to porous and dense substrates, including concrete and metal. That is the sealant maker specifying its own primer, which is how you should read any primer requirement: from the product you are actually using.
Porous masonry and the “scratch coat”
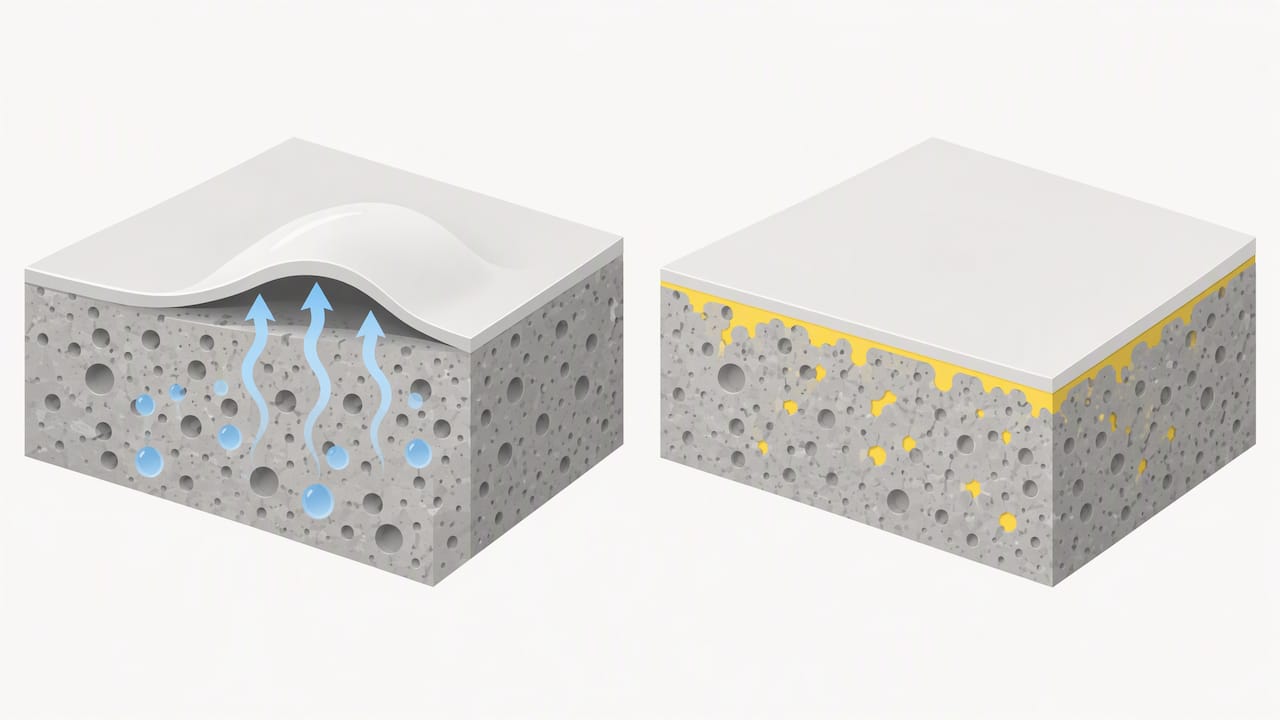
Concrete block and other porous surfaces can cause blistering or pinholing in liquid-applied products. GCP Applied Technologies explains in a technical letter on blistering and pinholing that this comes from moisture vapour and air trapped in the substrate expanding. Its guidance on waterproofing concrete block walls calls for a smooth surface, filled voids and, where needed, a parge coat. That is a membrane context, not a caulk bead on a window frame, but the lesson carries over: porous surfaces need stabilizing, and that is a decision for the job, not a guess.
For brick homes, the choice of sealant matters as much as the prep. See our note on the best window caulking for brick homes.
Timing: how long between primer and sealant
If a primer is needed, the wait is not optional, and it is not the same for every product.
- Too soon: the primer is still wet or solvent-heavy and the bond is weak.
- Too late: the primer can pick up dust or lose its ability to bond.
Sika’s data on its Duoflex Primer-5050 product page gives an example: that epoxy primer requires sealant application within a window of 2 to 36 hours after priming, and outside that window adhesion can fail. A different Sika primer, the Joint Tape SA primer, is described as drying tack-free in about an hour under standard conditions, and areas primed but left uncovered for more than 24 hours often need re-priming.
Two different products, two different schedules. Do not borrow a number from one for another.
Two habits that help:
- Prime only as much joint as you can seal the same day.
- Avoid puddled primer. It extends drying time and can lead to bond failure.
Ontario conditions change the answer
Our climate puts a joint through a lot. In January the sealant is cold and stiff while the frame and brick contract. In July everything expands. The sealant has to hold to both sides through every cycle, and adhesion is where it fails first.
Things we watch for locally:
- Temperature at the time of application. Check the product’s range. The DAP polyurethane sealant above lists 4.4°C to 37°C. Frost on a joint is a stop sign. We explain why in our note on exterior trim caulking above +5°C.
- Morning dew and overnight frost. A joint that looks dry at noon may not have been at 8 a.m. If a primer is part of the system, damp surfaces undermine it.
- Old coatings. Many Ontario homes have had several rounds of paint on window trim. Sealant bonding to a failing paint layer will peel with the paint, no matter how good the sealant is.
For extreme weather in particular, our guides on caulking for extreme weather and winter-proofing doors cover materials and timing.
How to test whether you need a primer
A test joint is cheap and it removes the guesswork. We recommend it on any building where you have not worked with the substrate before, which is nearly every renovation.
- Choose a spot that is representative, such as the same brick, the same painted trim, the same aluminum.
- Clean it exactly as the full job will be cleaned.
- Apply a short bead of the sealant you plan to use, tooled as normal.
- Let it cure for the time the data sheet gives.
- Pull on the bead. A good bond tears the sealant itself (cohesive failure). A bad one peels cleanly off the surface (adhesive failure).
- If it peels, repeat the test with the recommended primer, or change the sealant.
On larger commercial and envelope projects, this idea is formalized as mock-ups and standardized adhesion testing. We go into the details in our guide to ASTM C1521 and mock-ups.
Common mistakes
- Priming a joint that did not need it, then sealing over a primer that is not compatible with the sealant.
- Skipping the primer on a surface that did. Chalky stucco, weathered concrete and dusty block are the usual suspects.
- Painting over caulk too early. The paint skin cracks or wrinkles as the caulk finishes curing.
- Using painter’s acrylic caulk outside where a flexible weatherproofing sealant is needed.
- Caulking over old, failed sealant without removing it.
- Treating all caulks the same. Silicone, polyurethane, hybrid and acrylic latex each have their own prep and paint rules. Some silicone-based products need special handling if you plan to paint, so read the label before you buy.
We list more of these in caulking mistakes homeowners make.
Our perspective: what 25 years of Ontario joints taught us
We have resealed enough windows to say this plainly: the sealant is rarely the first thing to fail. The surface prep is. When a bead peels away clean from brick or trim after two winters, the cause is usually dust, moisture, old coating or a skipped test, not a bad tube.
So we do not treat “prime or don’t prime” as a rule. We treat it as a question about the surface and the product in front of us. On an interior paint job, we prime first and wait for the caulk to cure before the topcoat, every time. On an exterior joint, we clean it thoroughly, check the sealant’s data sheet, and test when the surface is unfamiliar. We use a primer when the product or the test calls for it, and we leave it out when it does not, because adding an unneeded layer is one more thing that can fail.
The other thing we would tell any homeowner or property manager: do it once, do it in the right temperature window, and do not chase a quick fix. A joint that looks fine in October and splits in February costs more than doing it right the first time.
— Felix
When to call a professional
Small interior touch-ups are a reasonable DIY job. Exterior joints are different. They protect the building from water and air leaks, and a bad bond can hide behind a neat-looking bead until water gets in.
It is worth bringing someone in when:
- the joints are on brick, block, stucco or concrete you cannot reach safely
- old sealant is cracked, pulling away or has been painted over repeatedly
- you have drafts or water staining near windows and doors
- you manage a multi-unit or commercial property and need consistent results across many openings
Kettle Contracting handles caulking and sealing for homes and commercial buildings across the Greater Toronto Area and Durham region. Depending on the problem, that means residential window caulking, door caulking and weather sealing, building envelope sealing or expansion joint sealing. If you are not sure what you need, contact us through our site and tell us what you are seeing. We will tell you whether it is a caulking job or something else.
FAQ
Should you prime before you caulk?
For painting, yes: prime bare surfaces, caulk the gaps, then paint once the caulk is cured. For exterior weatherproofing sealants, usually no, because most are designed to bond to clean, dry surfaces without a primer. Check the data sheet and test a joint when you are unsure.
How soon after priming can I caulk?
It depends on the primer. For ordinary interior paint primer, wait until it is dry to the touch and check the label. For adhesion primers used with construction sealants, the data sheet sets a window. One epoxy primer, for example, calls for sealing between 2 and 36 hours after priming.
Can I apply caulk over primer?
Yes, on painted work it is the normal approach, as long as the primer is fully dry and the caulk is labelled paintable or compatible. With construction sealants, only use a primer the sealant manufacturer approves, since an incompatible one can weaken the bond.
How long should caulk cure before painting?
Follow the label on your caulk. Painting over caulk that has not cured can lead to cracking or surface defects, and cold or damp rooms slow curing. If it still feels soft or tacky, wait longer.
Do I need a primer for exterior window caulking in Ontario?
Often not, if the frame and brick or siding are clean, dry and sound, and your sealant is rated for the temperature. A primer becomes likely on chalky, dusty or highly porous surfaces. A test joint settles it before you seal the whole building.
Sources
- Sika, Sikaflex NP-1 technical data
- Sherwin-Williams, Loxon concrete and masonry primer-sealer data
- Benjamin Moore, how to paint trim
- Benjamin Moore, how to paint wood panelling
- DAP, polyurethane construction sealant data sheet
- Sika, Sikaflex-1A product page
- Sika, Duoflex Primer-5050 data sheet
- Sika, Duoflex Primer-5050 product page
- Sika, Joint Tape SA primer
- GCP Applied Technologies, blistering and pinholing technical letter
- GCP Applied Technologies, waterproofing concrete block walls