
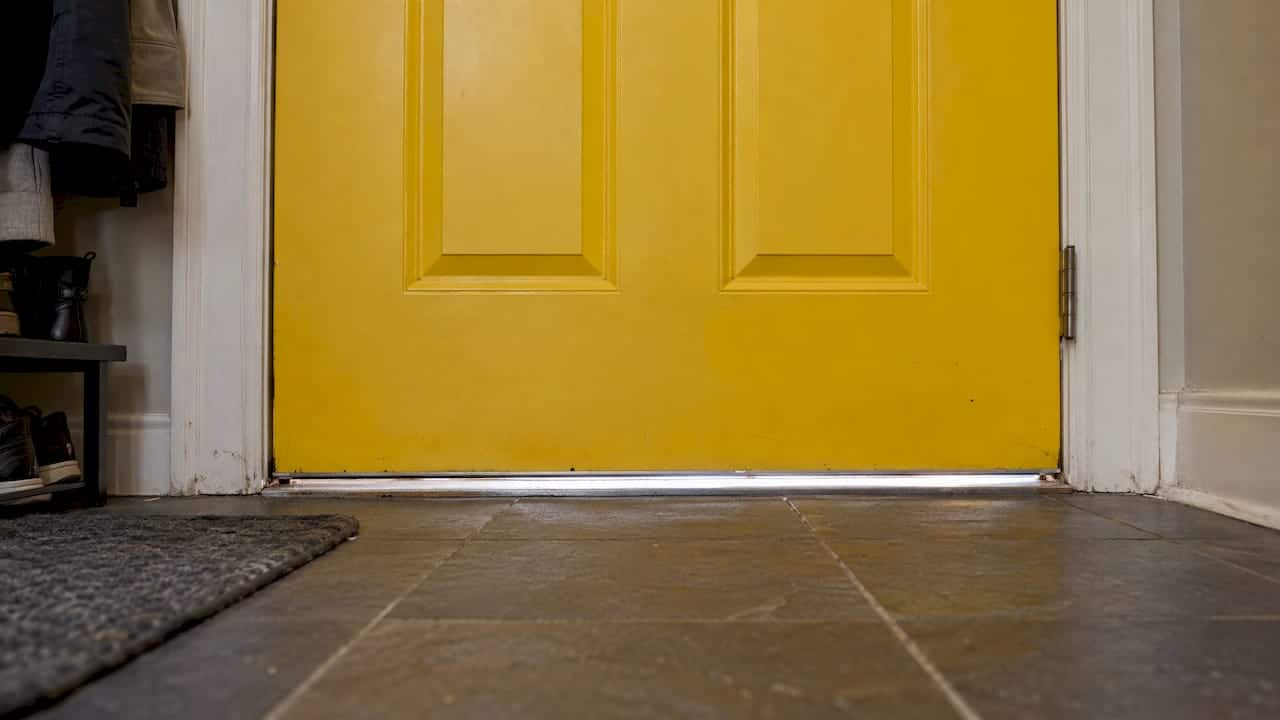
If you can see light under a closed exterior door, air is getting through the same gap. In most Ontario homes the fix is a door sweep or a threshold adjustment. If the weatherstripping around the sides and top is also tired, it needs replacing too. Our door caulking and weather sealing service covers the sealing side of the job, so you don’t have to work out which part has failed.
This guide covers what the gap tells you, how to measure it, how a sweep differs from weatherstripping, and how to seal the gap so it lasts through an Ontario winter. It also covers the bedroom case, where the light you’re fighting is the hallway light at night.
TL;DR
- Visible daylight around a closed, latched exterior door means air leakage. Treat it as a repair job, not a quirk of the house.
- A sweep seals the bottom of the slab. Weatherstripping seals the sides and top. They are not interchangeable, and a leaky door often needs both.
- Adjust hinges, the strike plate and the threshold before you add any new seal, because a seal cannot make up for a door that sits out of position.
- Choose durable materials such as vinyl or metal-backed products for an exterior door. Cheap foam and felt wear out faster in weather.
- Call a pro if the gap is wider at one corner, the door needs a shove to latch, or the sill and threshold are soft, cracked or rusted.
Table of Contents
- What light under a door is telling you
- If the light is a bedroom problem
- Step 1: Find the gap and measure it
- Step 2: Fix the door’s position before you seal
- Weatherstripping vs door sweep: what each one does
- Step 3: Seal the gap under the door
- When the gap is not a weatherstripping job
- Why an Ontario door needs the sealing done right
- How we look at it
- Have us seal the door for you
- FAQ
- Sources
What light under a door is telling you
A door is a moving part in a fixed opening. It needs a small clearance to swing, and the seals are there to close that clearance. When you can see light, the seals aren’t doing it, or the door has moved.
The U.S. Department of Energy says that visible daylight or a loose-fitting exterior door can indicate air leakage. Its guide has you adjust loose hinges, knobs and strike plates before you fit new weatherstripping.
The size of the opening matters more than people expect. A University of Vermont Extension energy bulletin notes that a pair of 6’8" exterior doors with no weatherstripping can have a 1/4-inch opening along the meeting edge, about 20 square inches open to the outside. That is roughly a small window left open all winter.
In our experience on Durham Region doors, light under the door usually comes from one of these causes:
- A sweep that is flattened, torn, hardened or missing.
- A threshold that has dropped or been set too low.
- Hinges that have loosened, so the door sags and drags on one side.
- A slab that has warped or a frame that has gone out of square.
- Settling, or an original install that was never quite right.
A tiny, even sliver at the very bottom corners can be normal on some entry doors. A band of light across the width, or a gap that is wider on one side, is not.
If the light is a bedroom problem
Some readers searching this aren’t dealing with weather at all. The gap under an interior door lets hallway light into a bedroom or home office. The Sleep Foundation says the gap between a door and the floor can let light in at night. It suggests turning off the hallway lights or putting a rolled towel against the gap.
A towel works for a night. For something permanent, a slide-on or screw-on interior door bottom seal does the job. Measure the gap and the door thickness first, and choose a seal that clears your flooring. A seal that drags on carpet will wear out quickly and make the door hard to close.
The rest of this article is about exterior doors, because that is where a gap costs you heat, lets in water and invites pests.
Step 1: Find the gap and measure it
Before you buy anything, spend ten minutes finding out what is actually wrong. Most failed repairs we see come from buying a seal for the wrong problem.
The flashlight test
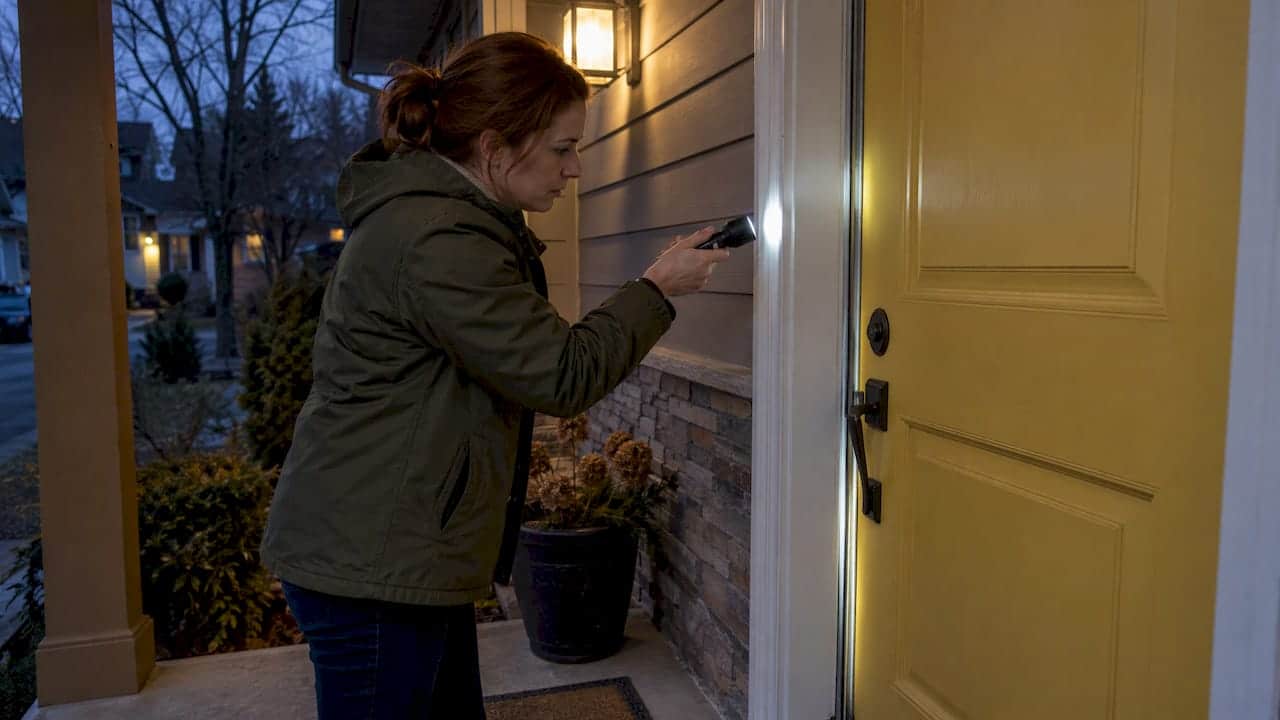
The University of Vermont bulletin describes a simple method. Turn off the lights inside and out, close the door, and have a helper stand inside. Move a flashlight slowly around the outside edge of the door. Any spot where your helper sees light is a spot where the door isn’t sealed. Do this at dusk or on a dark evening so the test is clear.
On a bright day you can do the reverse. Turn off the interior lights, lie down at floor level, and look along the bottom of the door for daylight.
The paper test
Close and latch the door on a strip of paper, then pull it out. If it slides free with no resistance, that spot isn’t sealing. Repeat at four or five points along each side and across the bottom. Where the resistance changes from firm to nothing, you have found the leak.
Measure at three points
Slide a ruler or a stack of coins under the door and measure the gap at the hinge side, the middle and the latch side. Write the three numbers down.
- Even gap at all three points: the door is in good position. A sweep will fix it.
- Gap that changes noticeably from one side to the other: the door has dropped or the frame has moved. Fix the position first.
- Very large gap: the threshold may have been set too low or the slab may not belong in that opening. Have it looked at before you buy a sweep.
Also check the sides and top while you’re at it. A new sweep stops light at the bottom. If the perimeter weatherstripping is flattened, cracked or painted over, the door still leaks on three sides. Our guide on how to spot bad door caulking shows what the failed caulk and seals around a door look like.
Step 2: Fix the door’s position before you seal
A seal works by touching the door evenly. If the door sits wrong, the seal can’t touch evenly. Fix these in order:
- Tighten the hinge screws. A loose top hinge lets the door sag and opens a wedge at the latch side.
- Check the strike plate. If the latch isn’t pulling the door firmly into the weatherstripping, adjust the plate so the door closes snug.
- Adjust the threshold. Most newer entry doors have an adjustable threshold. Family Handyman explains that the big screwheads raise or lower a narrow adjustable strip. If there is light between the threshold and the door, turn the nearest screws counterclockwise to raise it. Keep the strip straight with a straightedge, and don’t raise it so high that it presses hard on the door’s bottom seal.
Our page on exterior door threshold types explains what you’re dealing with if your threshold doesn’t adjust. If the leak is water rather than air, read exterior door leaks: find the cause before you seal first. Sealing over a water path hides the problem and doesn’t fix it.
Weatherstripping vs door sweep: what each one does
People use these words as if they meant the same thing. They don’t, and the difference decides what you buy.
| Weatherstripping | Door sweep | |
|---|---|---|
| Where it goes | Along the sides and top of the door, between the slab and the frame | Along the bottom edge of the door |
| What it seals | The perimeter gap when the door is closed | The gap between the slab and the threshold |
| Typical form | Compression foam, kerf-in strips, bulb or tubular vinyl, metal-backed | Screw-on, slide-on, snap-in or adhesive strips in vinyl, rubber or brush |
| Fixes light at the bottom? | No | Yes |
| Fixes light at the sides? | Yes | No |
Save on Energy, the Ontario energy-efficiency program, says that a door sweep can keep drafts out where air enters from under a door. It notes that sweeps can be plastic, vinyl or felt brush, and that they install along the bottom. Replacing the side strips won’t close a gap under the slab, and a new sweep won’t help with a gap at the latch side.
One warning from the field: if you seal only the bottom, the remaining leaks can feel stronger, because the same pressure now pushes through fewer openings. Do the full perimeter in one go.
Which sweep for which gap
- Vinyl or rubber fin sweeps work well on a flat, even threshold. They seal tightly but can stiffen in deep cold.
- Brush sweeps handle grit, snow and an uneven threshold, but a brush is never quite as airtight as a fin.
- Slide-on sweeps suit doors where the bottom edge is clean and you can slide the seal on from the side.
- Door-bottom seals with a drop-down mechanism are made for uneven floors, though they cost more.
Match the seal to what is already on the door. A seal that pushes into a kerf (a slot cut in the door or frame) needs a kerf-style replacement. A screw-on sweep needs a flat bottom edge.
Material: durability against price
Save on Energy says that felt and foam are cheaper but don’t hold up well to weather, while metal and vinyl cost more but last longer. On an exterior door facing a Durham Region winter, with snow, ice-melt salt and daily use, the longer-lasting materials are the better choice. If you’re weighing a repair against replacing the whole door, door installation cost ranges show what a new unit with proper flashing involves.

For how much to buy, Save on Energy suggests adding up the perimeters of the doors and windows you’re sealing and adding 5 to 10% for waste. Run one long strip along each side of the door so the pieces meet tightly in the corners.
Step 3: Seal the gap under the door
Here is the routine for a screw-on sweep, which suits most steel and fibreglass entry doors and wood doors with a flat bottom.
- Remove the old sweep. Take out the screws and pull it off. Scrape any old adhesive or caulk residue off the door bottom. Wipe with a cleaner that doesn’t leave a film, and let it dry.
- Measure the width of the door bottom. Measure the actual door, not the opening. Doors are not always the width you expect.
- Cut the new sweep to length. A hacksaw cuts vinyl and aluminum-backed sweeps cleanly. File the cut edge smooth.
- Position it. With the door closed, hold the sweep so the flexible part just touches the threshold. It should brush the surface with a light drag, not fold flat.
- Mark and drill pilot holes. Pilot holes stop wood from splitting and keep screws straight.
- Attach it loosely, check it, then tighten. Open and close the door a few times. If it drags or leaves a gap, adjust before the final tightening.
- Retest. Run the paper test along the bottom again. The resistance should feel the same all the way across.
If the bottom edge isn’t flat, or you’d rather not drill into the door, an adhesive-backed sweep is the alternative. Draw a level line first, peel the backing slowly and press it on along the line. Adhesive bonds poorly on cold, dirty or painted surfaces, so read the product’s minimum application temperature. A late-autumn install in the cold can peel by the time deep winter arrives.
Sealing the sides and top
The DOE guide has you set the strip over a thin bead of caulk aligned with the screw holes, and fasten it with the manufacturer’s short screws. Install the top piece first, then the sides. Don’t stretch the strip to cover a gap, and don’t paint flexible seals, because paint stiffens them and they stop sealing.
Caulk has a role at the door frame too. If the gap is between the frame and the wall, or around the threshold, that is a caulking job and not a weatherstripping one. See our walkthrough on how to caulk around door thresholds, and caulking vs foam sealant for doors if you’re deciding what goes into the gap around the frame.
Don’t over-seal
Thicker is not better. A seal that is too thick can stop the latch from engaging, and a seal that is too thin never touches. You want consistent light contact all the way around, with the door closing normally. If you find yourself stacking layers of foam to chase a gap, the door position is the problem, not the seal.
When the gap is not a weatherstripping job
Some doors need more than a new seal. Call someone in if you see any of these:
- The gap is wider at one corner than the other, even after hinge and threshold adjustment.
- You have to lift or shove the door to get it to latch.
- The jamb or sill is soft, discoloured or stained at the bottom, which suggests water has been getting in.
- The threshold is cracked, loose or rusted through.
- The slab is visibly warped, or the frame is out of square.
A warped slab or a rotted sill is a carpentry and replacement question. For a door that is simply leaking air because the seals and caulking have aged, sealing is the right fix. Our page on fixing a front door air leak walks through that case for Oshawa-area homes.
If you manage a multi-unit building or a commercial property, the same logic applies at scale. Gaps at one door usually mean several doors of the same age have the same problem, so inspect them all in one pass and fix them together.
Why an Ontario door needs the sealing done right
Ontario doors go through freeze-thaw cycles, wind-driven rain and snow, ice-melt salt and big temperature swings between seasons. A seal that is fine in July gets stiff and shrinks in January. A bead of caulk that is poorly bonded cracks when the frame moves.
That’s why our rule is to do the job once, with materials that suit the climate, and not patch it every autumn. For more on how that works, read door caulking for extreme weather.
How we look at it
The most common mistake we see with light under a door is treating the gap as the problem. The gap is the symptom. The door has dropped, the seal has aged, or the caulking around the frame has opened up, and each one needs a different fix.
After years of working on doors across Oshawa, Whitby and Ajax, our approach doesn’t change much. Look at the whole door, not just the bottom. Check the hinges, threshold, seals and caulking together. Use materials that will cope with an Ontario winter, and do the sealing in one visit so you aren’t chasing leaks from one edge to the next.
A quick fix that looks fine in October often shows its limits by February. We would rather you have a door that stays sealed than one that needs attention every year.
Felix
Have us seal the door for you
If you’d rather not spend a weekend on your knees with a hacksaw, our door caulking and weather sealing service is built for this. We serve homeowners, property managers, landlords and commercial owners across the Greater Toronto Area, including Oshawa, Whitby, Ajax, Pickering, Bowmanville and Cobourg.

See the details on our door caulking and weather sealing page. If you’re sealing a whole building, our building envelope sealing service treats doors, windows and joints together. For window and door installation or other work, see our services.
FAQ
Should you be able to see light under an exterior door?
No. You shouldn’t see obvious daylight under or around a closed, latched exterior door. A very small, even sliver at the bottom corners can occur on some doors, but a band of light across the bottom means the seal or threshold needs attention.
What is the best way to seal a gap under a door?
For an exterior door, fit a door sweep sized to the door’s width and set so it just brushes the threshold. First tighten the hinges and adjust the threshold if the gap is uneven. Choose vinyl, rubber or brush material over felt or foam for durability.
What is the difference between weatherstripping and a door sweep?
Weatherstripping seals the sides and top of the door against the frame. A sweep closes the gap along the bottom against the threshold. Replacing one does not fix a leak at the other, so check all four edges.
How do I block light under a bedroom door?
A slide-on or screw-on interior door bottom seal blocks the light permanently. For a quick fix, a rolled towel against the gap works for the night. Pick a seal that clears your flooring so the door still opens freely.
How wide a gap can a door sweep cover?
It depends on the product. Slide-on interior seals are sold for specific ranges, so check the package against your measurement. If the gap varies a lot from one side of the door to the other, fix the door position first, since a sweep can’t compensate for a door that sits out of true.
Sources
- Install Weatherstripping on an Exterior Door, U.S. Department of Energy
- Energy Series: What about Caulking and Weather-Stripping? University of Vermont Extension
- How to Make Your Bedroom Dark for Better Sleep, Sleep Foundation
- Raise a Door Threshold To Reduce Drafts, Family Handyman
- Weather strip your windows and doors, Save on Energy