
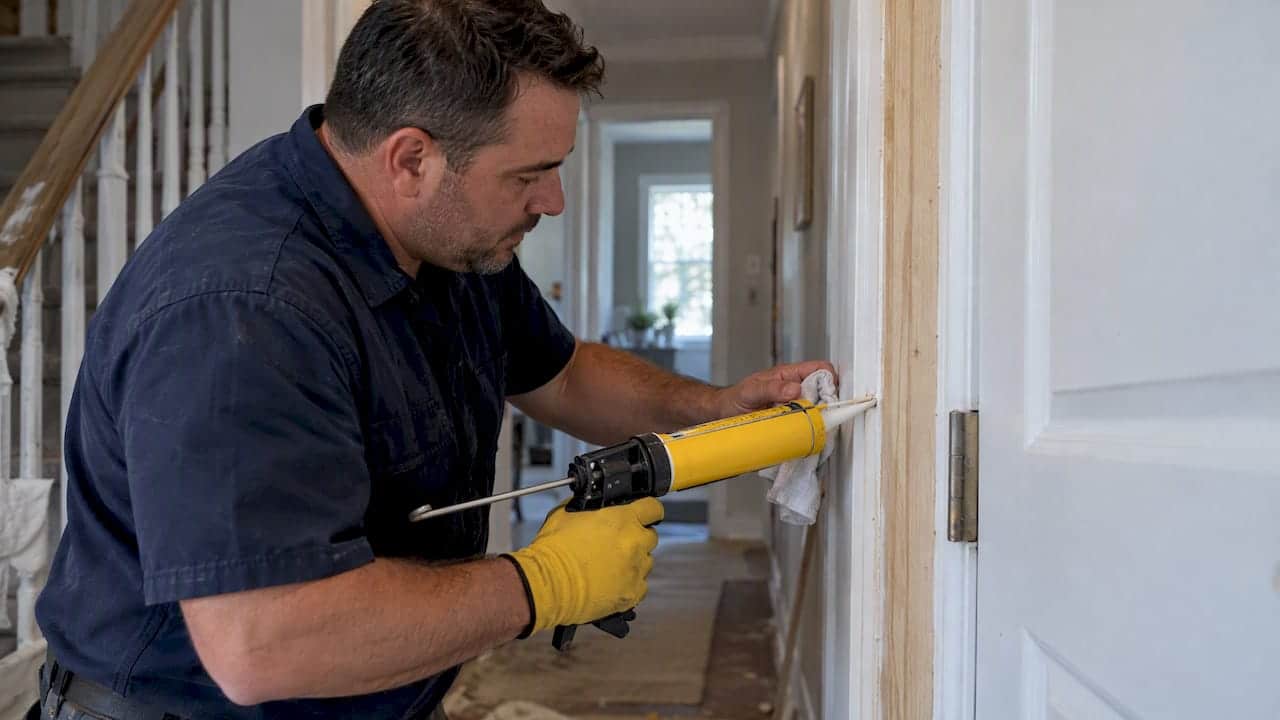
Yes, you should caulk before painting, as long as you use a paintable acrylic caulk and prep the surface properly first. Timing and preparation matter more than which tube you grab off the shelf. The Home Depot Canada guide backs this up, and after years of sealing windows and trim across Ontario, we at Kettle Contracting see the same thing on every job site.
TL;DR:
- Use a paintable acrylic latex or acrylic latex plus silicone caulk for interior and exterior joints to ensure proper adhesion and flexibility.
- Proper surface preparation, including cleaning and priming, is crucial; avoid applying new caulk over old or loose material to prevent early failure.
- Apply caulk after priming and cleaning, but before the final topcoat, to protect the bead from UV damage and moisture exposure.
- Fast-dry acrylic caulks can be painted within 20 to 40 minutes, but full curing can take several days, especially in cold or humid conditions.
- For long-lasting results, select sealants rated for joint movement, work in suitable temperatures, and consider professional help for large or critical sealing projects.
Table of Contents
- When should you caulk in the painting sequence?
- How do you choose a paintable caulk?
- How do you prepare joints before caulking?
- How do you apply a clean, paintable bead?
- How long should caulk dry before you paint over it?
- How do you fix caulk problems after painting?
- What pro tips help caulk survive Ontario winters?
- Is this a DIY job or one for a professional?
- Professional caulking services for homeowners who’d rather skip the ladder
- FAQ
- Sources
When should you caulk in the painting sequence?
Caulk goes on after cleaning and any necessary priming, but before your final topcoat. This order lets the paint seal the caulk and protect it from UV breakdown and moisture, instead of leaving a bare bead exposed to the weather.
Exterior and interior jobs have different pressures to manage:
- Exterior joints face UV exposure, temperature swings and material movement, so flexibility and weathering resistance matter most.
- Interior joints, especially in bathrooms and kitchens, deal with humidity and need a caulk built to resist moisture without breaking its paint bond.
- New masonry needs time to cure before sealing, and freshly installed windows often call for a specialty sealant rather than a standard acrylic.
Skip this order and you end up repainting a joint that’s already peeling within a season.
How do you choose a paintable caulk?
Acrylic latex and acrylic latex plus silicone are the right call for almost every paintable job, interior or exterior. They accept paint cleanly, clean up with soap and water, and hold their flexibility through seasonal movement, according to the Home Depot Canada guide.
Pure silicone is the one to leave on the shelf for this job. It repels paint rather than accepting it, which is exactly why it works well around tubs and sinks but fails everywhere you plan to roll or brush over it.
- Acrylic latex: easy cleanup, fully paintable, best for baseboards and interior trim.
- Siliconized acrylic: adds moisture resistance while staying paintable, good for window and door frames.
- Pure silicone: skip it for painted work, save it for wet-area gaps that never see a brush.
Some acrylic caulks sold in Canada advertise very fast paint-ready times, often within an hour, according to Benjamin Moore’s acrylic white caulk listing, which tells you how fast you can move once the bead is tooled. Read the label for “paintable” and the recoat time before you buy, not after.
How do you prepare joints before caulking?
Surface prep decides whether your caulk lasts one season or ten. Pulling new caulk over old, loose material is the single most common failure we see, and the Home Depot Canada guide flags the same issue.
- Scrape or wire-brush masonry joints to remove every trace of old, cracked caulk.
- Wipe metal and glass surfaces with a solvent cleaner to strip grease and residue.
- Clean wood trim with soap and water, then rinse and let it dry fully.
- Prime bare, porous substrates like raw wood or masonry before sealing, so the caulk bonds properly instead of soaking in unevenly.
- Confirm the surface is bone dry. Trapped moisture under a fresh bead is a guaranteed callback.
Pro Tip: Run your fingernail along the old bead before you start. If it lifts in strips, the whole joint needs to come out, not just the cracked sections.
Our guide to preparing windows for caulking walks through this in more detail if you’re tackling frames specifically.

How do you apply a clean, paintable bead?
A neat bead starts with the cut, not the trigger. Snip the nozzle at an angle sized to the gap you’re filling, hold the gun at roughly 45 degrees, and keep steady, even pressure as you move along the joint.
- Cut the tip small for hairline gaps, larger for wider joints.
- Draw the gun smoothly in one direction rather than stopping and starting.
- Tool the bead immediately with a wet finger or a silicone-tipped tool to press it into the joint.
A few extra details separate a tidy line from a sloppy one:
- Mask off clean edges with painter’s tape and pull it away at a 45-degree angle right after tooling for a crisp line.
- Pack deep gaps with backer rod first so the caulk only bridges the top portion of the joint instead of sinking in.
- Use a triangular or V-shaped bead profile on corner joints for better adhesion on both sides.
The Building Science paper on caulks and sealants makes a point worth repeating here: joint design and depth control, not the product label, decide whether a seal holds under movement.
How long should caulk dry before you paint over it?
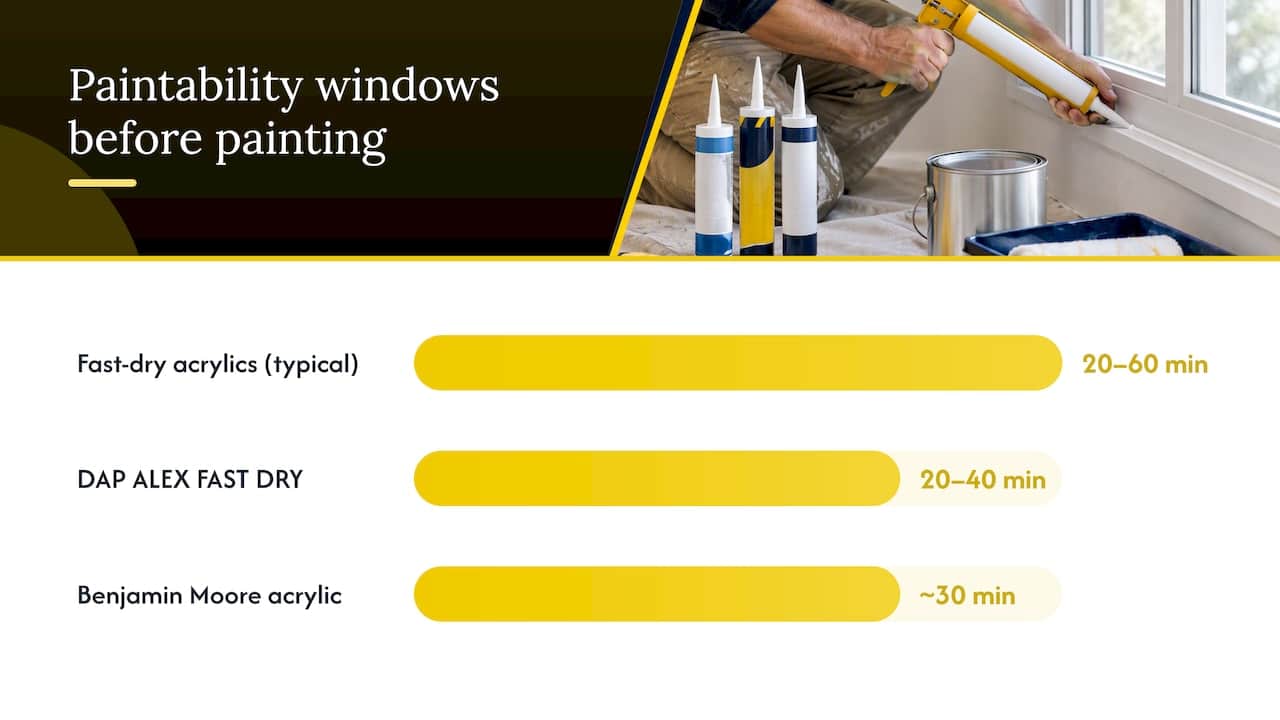
Fast-dry acrylics typically allow painting within 20 to 60 minutes, but that is not the same as full cure, which can take several days depending on the product. DAP’s ALEX FAST DRY formula lists paintability in as little as 20 to 40 minutes, and Benjamin Moore’s acrylic caulk advertises a similar 30-minute window. Painting early is fine for the surface skin, but the caulk underneath keeps maturing for days.
Temperature, humidity and the substrate all affect those windows. Cold, damp conditions slow drying considerably, so give it extra time on a chilly fall day.
- Touch the bead lightly with a clean finger. If it’s tacky, wait longer.
- Brush a small test patch of your actual paint and primer onto a hidden section first.
- Watch for lifting or discolouration before committing to a full coat, since some sealants react poorly with certain primers.
Our piece on whether you can paint over window caulk covers the compatibility angle if you’re unsure about a specific paint and caulk pairing.
How do you fix caulk problems after painting?
Paint pulling away from the bead almost always means the caulk wasn’t paintable to begin with, or it went over a dirty surface. The fix is to cut it out, clean the joint properly, and reseal rather than patching over the problem.
- Small cracks: cut out the failed section, clean thoroughly, and re-caulk that stretch only.
- Visible or lumpy beads: often a sign of poor tooling. Re-tool while the caulk is still workable, or redo it.
- Large movement joints that keep failing: these usually need backer rod and a professional assessment rather than another tube of caulk.
Covering a structural gap with a cosmetic bead just hides the problem until it reappears, usually at the worst time of year. Our list of common caulking mistakes covers the patterns we see most often on service calls.
What pro tips help caulk survive Ontario winters?
Freeze-thaw cycles are brutal on sealant, and the joints that fail are almost always the ones where material choice or application timing was off. A few checks separate a seal that lasts from one that cracks by spring.
- Match the joint width to a flexible sealant rated for the movement range, not just whatever’s cheapest at the hardware store.
- Apply within a reasonable temperature window. Caulking in near-freezing conditions reduces adhesion and extends cure time significantly.
- Pull masking tape before the bead skins over, not after, for the cleanest paint line.
Pro Tip: Work in short sections and tool each one before moving to the next. Trying to lay a long bead first and tool it all at once almost always leaves ridges.
Properly applied first-grade caulking can last well beyond 10 years, according to NRC specifications, which is the standard we aim for on every window and door we seal.
Is this a DIY job or one for a professional?
Small trim runs and countertop joints are well within DIY range for most homeowners. Building envelope work, large expansion joints, or anything tied to long-term water protection is trade-specific, and a rushed seal there costs far more to fix later than it would have to get right the first time.
— Felix
Professional caulking services for homeowners who’d rather skip the ladder
When the job involves more than a tube of caulk and a weekend, we handle it as Kettle Contracting. We offer residential window caulking, door caulking and weather sealing, and building envelope sealing across the Greater Toronto Area, using premium materials suited to our climate’s freeze-thaw cycles.

A typical small job starts with an on-site look at the existing caulk and joint condition, followed by full removal of failed material, proper cleaning, and a fresh bead sized and tooled for the gap. We quote honestly before we start, and we stand behind the finished seal.
If a cure-time question comes up on concrete surfaces specifically, this tape test guide for concrete sealer is a useful outside reference for that narrower case.
Ready for a second opinion on a joint that keeps failing, or a full estimate for your windows and doors? Request a no-obligation estimate from our residential caulking team and we’ll walk the property with you before any work begins.
FAQ
Should you caulk before painting?
Yes, caulking before painting is the correct order for most interior and exterior trim, windows and doors. Caulk the joints after cleaning and priming, then apply your topcoat once the caulk is paint-ready, as outlined in the Home Depot Canada guide.
What type of caulk should you use before painting?
Acrylic latex or acrylic latex plus silicone are the best choices for paintable jobs, since both accept paint cleanly and hold up to normal movement. Pure silicone should be avoided for painted surfaces because paint won’t bond to it properly.
Can you paint immediately after caulking?
Some fast-dry acrylic caulks allow painting in as little as 20 to 40 minutes, according to DAP’s product listing, but that’s paint-ready, not fully cured. Test a small patch first, especially in cooler or humid conditions where drying slows down.
What is the caulk paint trick?
The caulk paint trick refers to brushing or rolling a thin coat of paint directly over fresh caulk once it’s paintable, which seals and protects the bead from UV and moisture damage. It only works when the caulk is labelled paintable and the surface underneath was clean and dry before application.
Sources
- How to caulk and use a caulking gun – The Home Depot Canada
- Caulks and sealants – Building Science
- Caulking compounds and specifications – NRC / Canadian Government
