
Energy bills are one of the largest operating costs for any commercial property in the Greater Toronto Area, and a surprising share of that expense walks right out through the gaps. Air leakage in commercial buildings is responsible for 25 to 40% of heating and cooling energy loss each year. Knowing how to reduce energy loss through commercial building sealing is one of the most direct ways facility managers can cut costs, improve occupant comfort, and protect long-term building performance. This guide covers every stage: assessment, preparation, execution, and verification.
Table of Contents
- Understanding energy loss and the impact of sealing
- Preparing your commercial building for effective sealing
- Executing sealing work for maximum energy savings
- Verifying sealing effectiveness and maintaining performance
- Why thorough sealing is a smart investment, not a quick fix
- Get expert sealing solutions tailored for your commercial building
- Frequently asked questions
Key Takeaways
| Point | Details |
|---|---|
| Air leakage impact | Air leakage accounts for a significant 25-40% of energy loss in commercial buildings, making sealing critical. |
| Preparation matters | Proper inspection, material selection, and tool readiness ensure effective sealing and long-lasting results. |
| Quality installation | Meticulous sealing with attention to joints and corners maximizes energy savings and reduces callbacks. |
| Verification and maintenance | Testing and regular upkeep preserve sealing performance, protecting investment and HVAC efficiency. |
| Expertise pays off | Professional sealing delivers durability, comfort, and cost savings beyond quick fixes or DIY attempts. |
Understanding energy loss and the impact of sealing
Air infiltration (the uncontrolled movement of outside air into your building through cracks, gaps, and poorly sealed joints) drives up heating and cooling costs in ways that many facility managers underestimate. Every cubic metre of cold air entering your building in a Toronto winter is air your HVAC system has to heat. Every cubic metre of humid summer air entering through a leaky curtain wall joint adds to your cooling load.
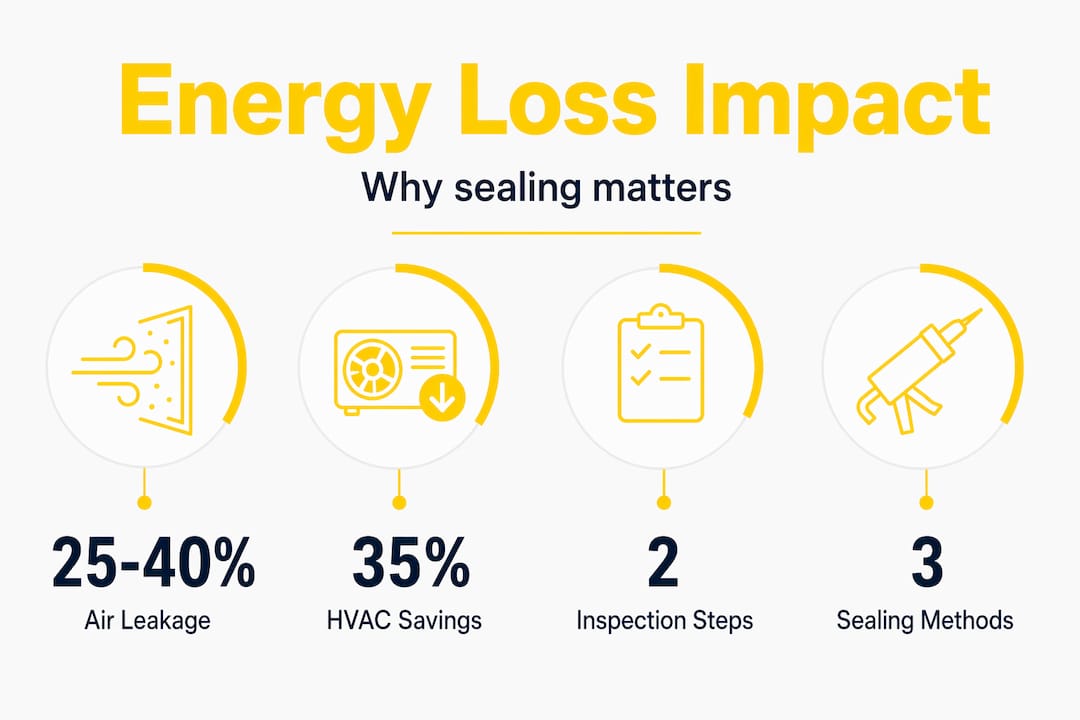
Heating and cooling energy loss accounts for 25 to 40% of total energy waste in typical commercial buildings. That is not a minor efficiency gap. It is a structural budget problem, and commercial building insulation alone cannot solve it if your building envelope is leaking.
Energy codes are tightening to address exactly this issue. The IECC 2021 (International Energy Conservation Code, which Ontario increasingly aligns with) requires max air leakage of 3.0 ACH50 for commercial construction. ACH50 refers to air changes per hour measured at 50 Pascals of pressure difference, a standard test used to quantify how much air is moving through your building envelope. Many older GTA commercial properties fail this benchmark significantly.
Why sealing directly affects your HVAC system
When air leaks go unaddressed, your HVAC units work harder and run longer to maintain set temperatures. This shortens equipment life, increases maintenance frequency, and inflates monthly energy bills. Here is what uncontrolled air leakage affects most directly:
- Heating costs in winter, especially in buildings with older window and door frames
- Cooling efficiency in summer, particularly in buildings with exposed west and south-facing glazing
- Humidity control, which affects both occupant comfort and building materials over time
- Ventilation balance, because uncontrolled air infiltration disrupts designed airflow in mechanical systems
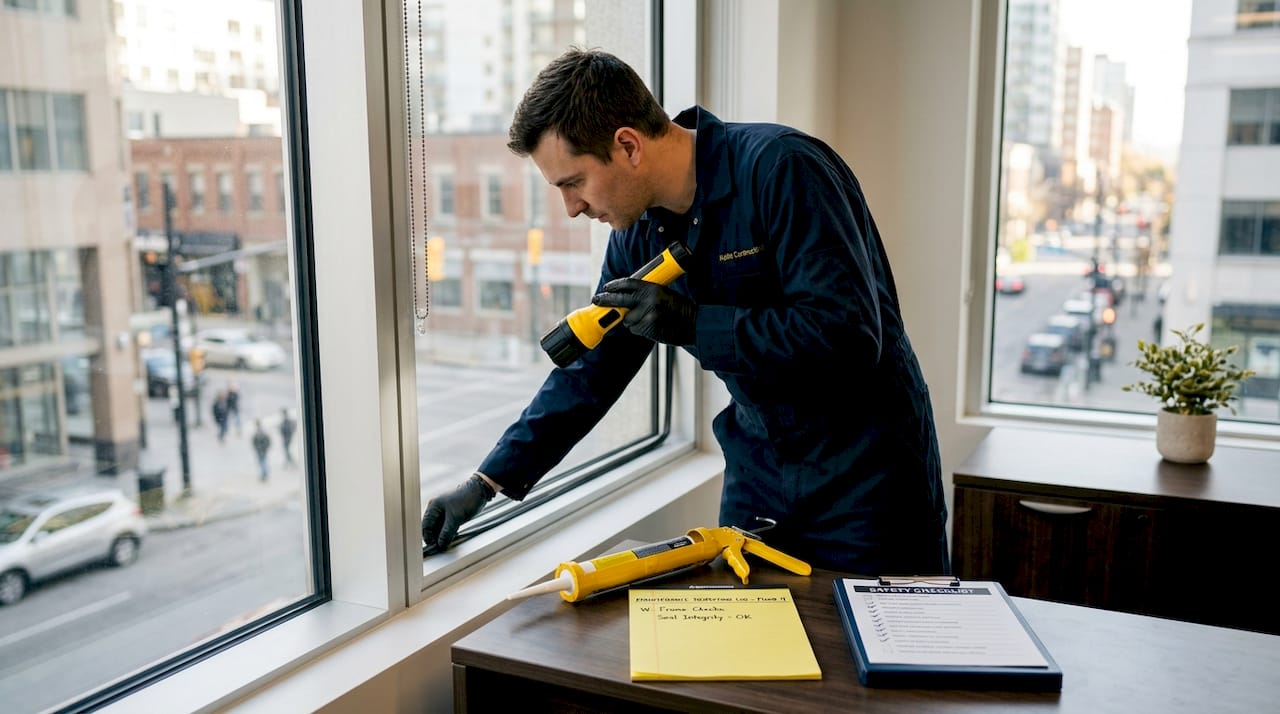
Addressing energy loss through door caulking and window caulking is not a cosmetic exercise. It is one of the highest-return maintenance tasks available to facility managers.
With energy loss caused largely by air leakage clearly established, let us get into how to prepare your building for an effective sealing project.
Preparing your commercial building for effective sealing
Good sealing work starts well before a tube of caulk is opened. Rushing into application without proper inspection and material selection is the most common reason sealing projects underperform. Here is how to approach preparation correctly.
Inspecting and locating air leaks
A visual inspection will catch obvious failures like cracked caulk, separated joints, and deteriorated gaskets. But visual inspection alone misses a significant number of leak points. More thorough methods include:
- Smoke testing: A technician passes a smoke pencil near windows, doors, electrical penetrations, and HVAC ducts to identify air movement visually
- Blower door testing: A calibrated fan depressurises the building to make air flow through leaks more detectable
- Thermal imaging: An infrared camera identifies temperature differences in wall and ceiling surfaces that indicate air or thermal bridging (heat escaping through structural elements)
Pay particular attention to these common leak locations in GTA commercial buildings:
- Window and curtain wall perimeters
- Door frames and thresholds
- Mechanical, electrical, and plumbing penetrations through exterior walls
- Expansion joints between concrete panels
- Roof-to-wall transitions and parapet details
Weatherproofing windows with caulking is one of the most productive starting points because window perimeters are among the most consistent sources of air infiltration in commercial buildings.
Choosing the right sealant for your conditions
Window weather sealing should be treated as a durability and ROI decision, not just a cosmetic one. The wrong sealant in the wrong location fails early, costs you a second application, and leaves the building vulnerable in the interim.
Use this table to match sealant type to application:
| Sealant type | Best use | Ontario climate suitability |
|---|---|---|
| Silicone | Exterior glazing, curtain walls | Excellent: handles freeze-thaw cycles and UV |
| Polyurethane | Concrete joints, expansion gaps | Very good: flexible and adhesive on porous substrates |
| Acrylic latex | Interior joints, paintable surfaces | Moderate: not suited for exterior exposure |
| EPDM gasket | Window and door compression seals | Excellent: durable under repeated mechanical pressure |
| Expanding foam | Penetrations, rough openings | Good: use closed-cell only in exterior applications |
For help deciding between expanding foam and caulk, the guide on caulk versus foam for windows lays out the tradeoffs clearly.
Pro Tip: Always confirm that the sealant you choose is rated for the substrate you are bonding to. Silicone will not adhere properly to certain coated glass or anodised aluminium without a primer. Using the wrong product on a high-rise curtain wall is an expensive mistake.
Executing sealing work for maximum energy savings
With preparation done, follow these steps to apply sealants effectively and avoid the failures most common in commercial sealing projects.
Step-by-step sealing process
- Remove all old sealant completely. Applying over failing or contaminated caulk is the single most common cause of early adhesion failure. Use a sealant removal tool and isopropyl alcohol to clean the joint fully.
- Allow surfaces to dry. Sealant applied to damp or frost-covered surfaces will not bond correctly. In Toronto’s shoulder seasons, check surface temperature before starting.
- Apply backer rod where needed. For joints wider than 6 mm, install foam backer rod (a cylindrical foam insert) before caulking to provide a proper joint depth-to-width ratio and reduce the amount of sealant required.
- Apply sealant in a continuous bead. Work in one direction without stopping. Gaps or air pockets in the bead create failure points.
- Tool the joint immediately. Press the sealant into the joint with a caulking tool or finger to improve adhesion on both sides and create a concave profile that sheds water.
- Pay extra attention to corners and transitions. Poor prep and weak corner treatment cause most sealing failures. Corners require bridging beads and careful tooling, not just a quick fill.
The guide on long-lasting caulking techniques covers joint geometry and application detail worth reviewing before tackling a large commercial project.
Comparing sealant performance for commercial applications
| Application | Recommended product | Failure risk if wrong product used |
|---|---|---|
| Exterior window perimeter | Neutral-cure silicone | Joint separation, water infiltration |
| Concrete expansion joint | Polyurethane sealant | Cracking under thermal movement |
| Interior wall penetration | Acoustic sealant or fire-rated caulk | Code non-compliance, air bypass |
| HVAC duct penetrations | Mastic sealant or metallic tape | Energy loss, humidity control failure |
For thermal sealing solutions in rough openings and wall penetrations, closed-cell spray foam insulation is worth including in your toolkit. Spray foam insulation can reduce HVAC workload by up to 35%, which is a substantial gain when you are dealing with a large building envelope.
Pro Tip: Do not use open-cell spray foam in exterior or below-grade applications. Open-cell foam absorbs moisture, loses its insulating value, and can cause mould issues over time. Closed-cell is the correct choice for any location exposed to the elements or humidity variation.
For a detailed look at what goes wrong when sealing is rushed, the breakdown of common caulk problems is a useful reference.
Verifying sealing effectiveness and maintaining performance
After applying seals, proper verification and upkeep ensure long-term energy savings. Sealing without verification is common and costly.
Testing what you have done
Post-install verification protects your budget and building performance. Without it, you cannot confirm whether you have actually resolved the problem or just addressed the visible ones. Use these methods:
- Blower door test (post-seal): Compare results to your pre-seal baseline. A meaningful improvement in ACH50 confirms the work is effective.
- Smoke pencil retest: Walk the same penetrations and perimeters you addressed. Any remaining smoke movement indicates a missed or poorly executed seal.
- Thermal imaging repeat: Schedule an infrared scan after the first cold snap of the season. Remaining thermal anomalies show gaps your initial inspection or sealing missed.
Establishing a maintenance routine
Commercial sealants do not last indefinitely. The GTA’s freeze-thaw cycle, UV exposure, and building movement all degrade seals over time. Here is a practical maintenance approach:
- Inspect all exterior sealant joints in spring and autumn. These are the seasons when seasonal movement has had the most impact.
- Document condition and photograph deteriorating joints. This gives you a baseline for comparison in future seasons.
- Re-caulk any joint showing cracking, separation, or loss of adhesion before it becomes a water infiltration path.
- Check UV-exposed foam insulation. Non-UV-resistant foam degrades quickly in sunlight, causing energy loss and triggering repair costs. Any expanding foam visible from the exterior should be protected with paint or a UV-rated sealant.
Pro Tip: Keep a simple maintenance log with photos and dates for every sealing area of your building. When you notice an energy bill spike or an HVAC performance issue, this log helps you quickly identify whether a failed seal is the likely cause.
Resources like the common sealing mistakes guide and the energy savings calculator are useful tools for tracking performance over time.
Why thorough sealing is a smart investment, not a quick fix
Having covered the technical process, here is what years on the job have taught us about what actually separates a sealing project that delivers lasting savings from one that needs to be redone in eighteen months.
The most important variable is not the brand of sealant. Installation quality drives results more than product choice alone. We have seen expensive silicone products fail in two years because the joint was not properly cleaned or because backer rod was skipped. We have also seen mid-range polyurethane hold up beautifully for a decade because the prep was thorough and the tooling was done correctly.
Commercial facility managers often face pressure to get sealing done quickly and at the lowest possible cost. The result is contractors who rush surface prep, skip verification, and apply sealant over existing caulk that is already failing. That approach does not reduce energy loss. It pushes the cost forward.
The real value of thorough sealing shows up in three places: lower monthly energy bills, fewer HVAC service calls, and a more comfortable building for tenants and staff. Occupant comfort is genuinely underweighted in most sealing discussions. Drafty perimeter offices in January are a tenant satisfaction and retention problem, not just a thermostat problem.
Investing in inspection, proper preparation, and post-seal verification is how you protect the money you spend on sealing. The ROI of professional door caulking is well-documented, and the same logic applies to every other element of your building envelope. Cheap sealing is rarely cheap over the long term.
Get expert sealing solutions tailored for your commercial building
If you want to ensure your building’s sealing work is done right the first time, Kettle Contracting is ready to help. We serve commercial property owners and facility managers across the Greater Toronto Area with professional-grade caulking and sealing services built to withstand Ontario’s climate and meet current energy code requirements.

Our team handles everything from initial inspection and material selection through to application and post-seal verification. We use the right products for each location and document our work so you have a record of what was done and where. Whether you are starting with caulking preparation, need guidance on durable sealing techniques, or are dealing with existing caulk issues, we bring the expertise to get it done properly. Contact Kettle Contracting today to discuss your building’s sealing needs.
Frequently asked questions
What is the main cause of energy loss in commercial buildings?
Air leakage through gaps and cracks around windows, doors, and penetrations accounts for 25 to 40% of heating and cooling energy loss in commercial buildings, making it the single largest controllable source of waste.
How can I identify air leaks in my commercial building?
Smoke testing and blower door tests are the most reliable methods for locating air leaks, especially in areas that a visual inspection would miss, such as electrical penetrations and curtain wall transitions.
Are spray foam insulations effective for reducing HVAC costs?
Yes. Closed-cell spray foam insulation can reduce HVAC workload by up to 35%, which translates directly into lower energy bills and reduced wear on your heating and cooling equipment.
How often should sealing be inspected and maintained?
Sealing should be inspected seasonally, ideally each spring and autumn, with prompt re-sealing of any joint showing cracking, separation, or adhesion failure to maintain continuous energy performance.
What materials are best for exterior sealing in Ontario’s climate?
UV-resistant, flexible sealants such as neutral-cure silicone and EPDM gaskets are best suited for Ontario’s exterior conditions because they handle freeze-thaw movement and UV exposure without premature failure.
Recommended
- Can Window Caulking Lower My Energy Bill? | Smart Ways to Save at Home – Kettle Contracting
- Energy Savings Calculator: Caulking Your Windows – Kettle Contracting
- Can Door Caulking Lower Your Energy Bill? | Expert Insights – Kettle Contracting
- Maximizing Energy Efficiency with Proper Window Caulking – Kettle Contracting