
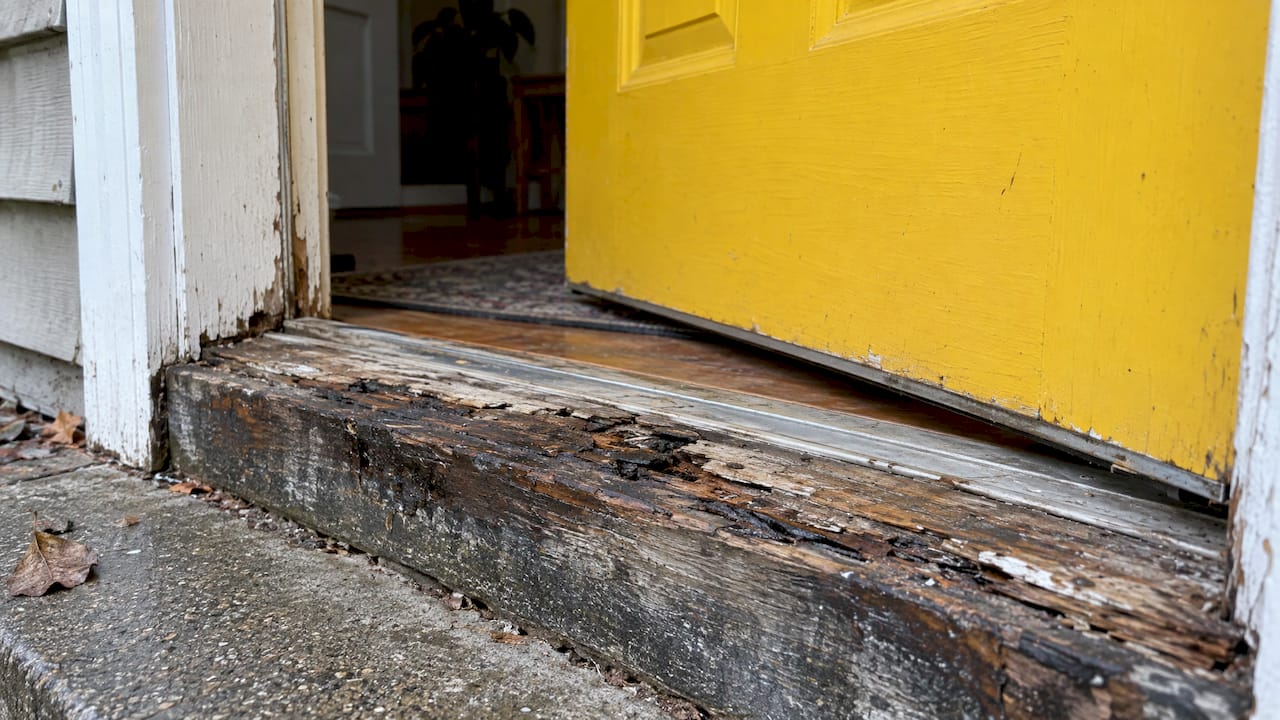
A rotted door threshold is almost never a threshold problem on its own. The wood rots because water got in and stayed there, and unless that water path is closed, a new threshold will rot out too. If the damage is only at the surface or the bottom of one jamb leg, a repair can work. If it has reached the sill, the subfloor or the wall framing, the sill or the whole frame should be replaced, and the joints around it resealed properly.
After 25 years of working on doors around Oshawa and the rest of Durham Region, we’ve seen the same pattern many times: a soft spot, a quick dab of filler, and the same spot rotting again two winters later. This guide walks you through how to tell how bad it is, what the repair options are, and how to seal the threshold so it lasts through Ontario’s freeze-thaw cycles.
TL;DR
- Soft, spongy or crumbling wood at the sill, threshold or bottom of the jamb is rot. If a screwdriver or awl pushes in easily, the wood has lost its strength.
- Small, isolated damage at the bottom of one jamb leg can sometimes be cut out and rebuilt. Rot that reaches the sill, subfloor or wall framing calls for replacement.
- Fix the water source first: the sill pan or flashing, the sealant joints, the paint and the drainage at the step.
- Seal the threshold so water drains out, not in. Don’t caulk the gap where the door itself meets the frame.
- If you’re not sure how deep it goes, have someone open it up and look before anything is sealed over.
Table of Contents
- How to tell the threshold is rotted
- Why door thresholds rot in the first place
- Repair or replace: where the line sits
- What a proper repair looks like
- How to seal a threshold so it stays dry
- Wood, composite or aluminum: choosing what goes back
- What it costs
- Perspective
- Protecting the door once it’s fixed
- Door sealing and replacement with Kettle Contracting
- FAQ
- Sources
How to tell the threshold is rotted
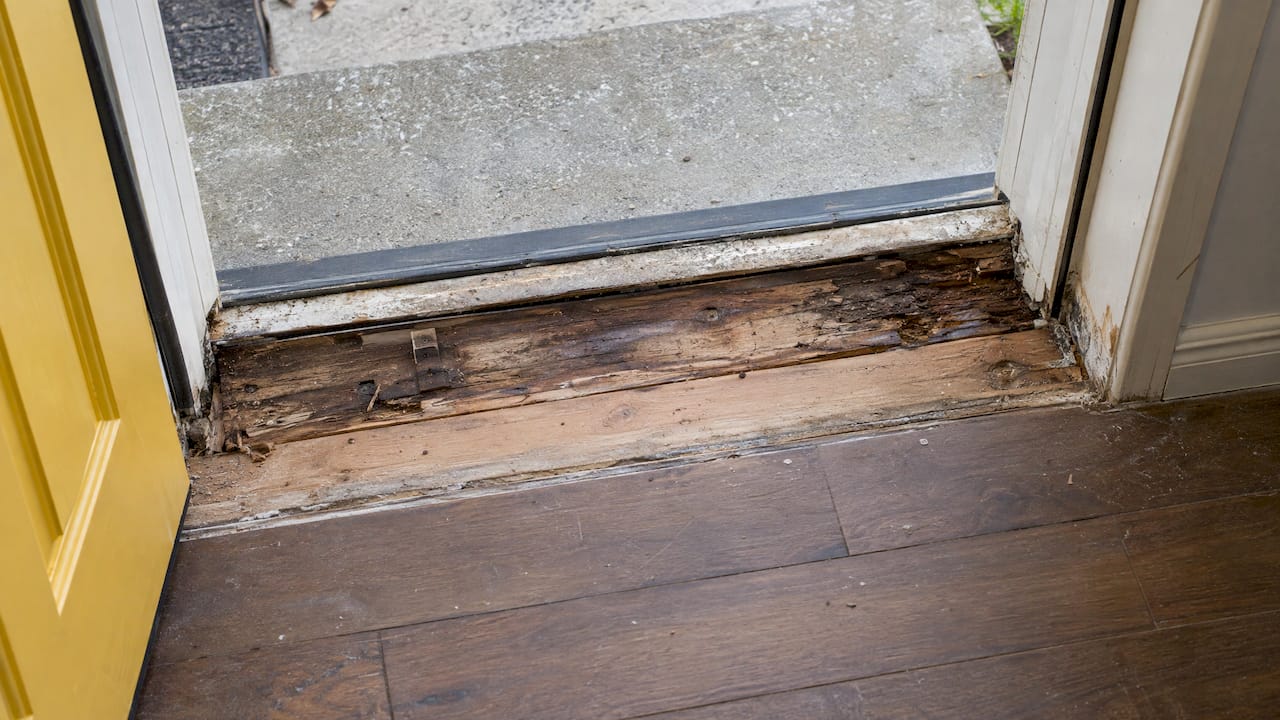
Start with what you can see and feel. Peeling or cracked paint along the bottom few inches of the door frame, dark stains, a musty smell, and wood that feels soft or looks fibrous are the usual signs. Rot guides from door companies describe the screwdriver test: if the tip pushes through, the wood is no longer sound.
Look in these places first:
- The threshold itself, especially at the outside edge and under the weatherstrip.
- The bottom of both jamb legs, where the frame meets the sill.
- The inside floor next to the door: lifting laminate, cupped hardwood, or a stained baseboard.
- The brickmould or trim at the bottom corners.
Surface can lie
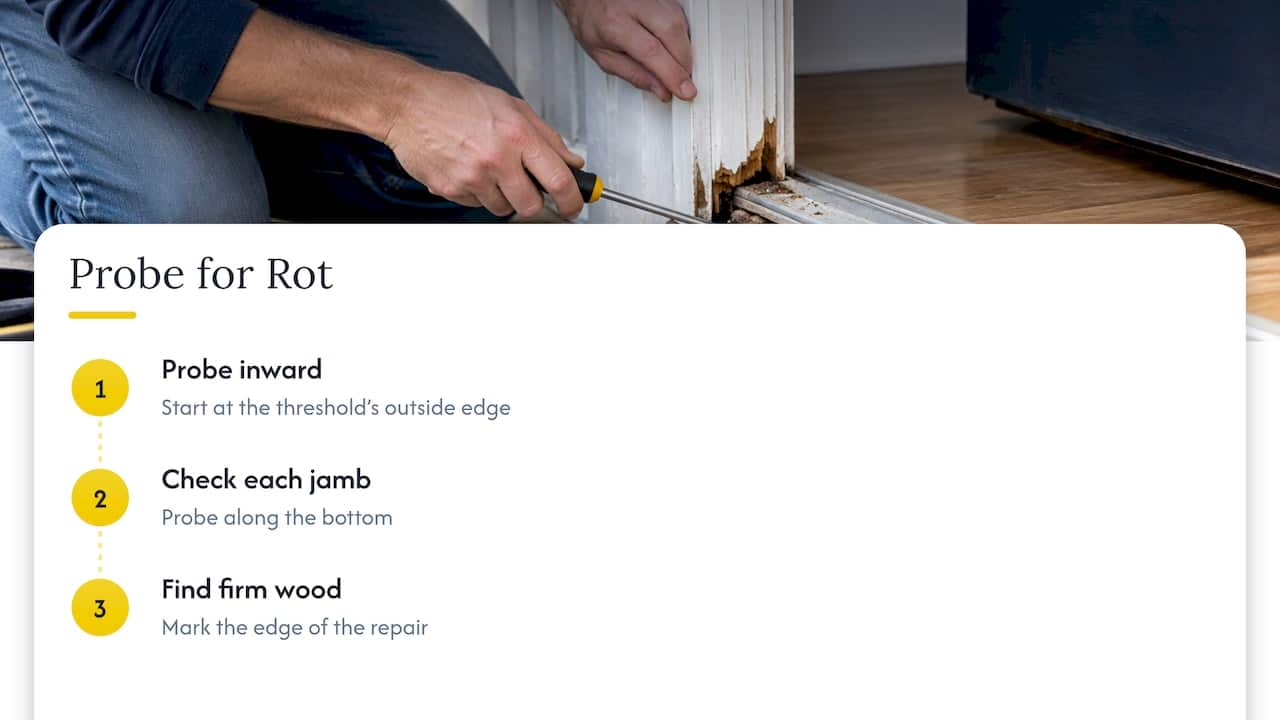
Wood can look fine and still be rotten underneath. This Old House recommends probing with an awl or penknife because damage can sit just below a normal-looking surface. It also mentions a moisture meter: a reading above 18 percent is a clear signal that the wood is rotting.
On site, we probe in a line from the outside edge of the threshold inward, then along the bottom of each jamb. The goal isn’t just to find the soft spot. It’s to find where the wood becomes firm again, because that’s the edge of the repair.
Why door thresholds rot in the first place
Wood needs steady moisture to rot. A door sill gets it from several directions at once:
- Meltwater and rain running to the door because the step or landing slopes the wrong way.
- Failed sealant where the frame meets siding, brick or the threshold, letting water wick behind.
- No sill pan, or a poor one. Without a pan under the sill, any water that gets past the threshold soaks the subfloor and framing.
- Worn paint or finish on the exposed wood, so it absorbs water every time it rains.
- Flashing above the door that doesn’t throw water clear of the joint.
- Ice. In our climate, water that gets into a joint freezes, expands and opens the gap wider the next time.
If you have a door that leaks during storms as well, it’s worth reading how to find the cause of exterior door leaks before anyone seals anything. Sealing over an active leak just traps the water inside.
Repair or replace: where the line sits
The honest answer depends on how far the rot goes, not how bad the surface looks. Here is the rule of thumb we work from.
| What you find | Usual approach |
|---|---|
| Soft spot confined to the bottom of one jamb leg, sill and subfloor dry and firm | Cut out the bad wood and rebuild or splice in new wood |
| Rot across the threshold, but the sill under it is solid | Replace the threshold, check the sill, reseal |
| Rot into the wood sill, casing or wall framing | Replace the affected sill or jamb, and repair what’s behind |
| Door no longer lines up with the threshold, or the frame has shifted | Replace the frame and likely the door |
| Same spot has been repaired before and failed | Open it up and fix the cause, then replace |
General industry guidance backs this up. One Canadian page suggests repair can make sense when rot is limited to the bottom 8 to 10 inches of one jamb leg with the rest of the jamb sound and the sill and subfloor underneath dry. Beyond that, replacement is the more reliable reset.
The subfloor question
This is where homeowners get surprised. The threshold is the part you see. The sill, the subfloor and the rim area below it are the parts that cost more if they stay wet. When we pull an old threshold, we always check what’s under it before deciding what happens next. A rotten subsill or damaged framing can turn a short job into a full day of carpentry, as This Old House notes in its threshold replacement guide.
What a proper repair looks like
We won’t give you a weekend project here, because the details decide whether it lasts. But knowing the steps helps you judge any quote you get.
- Find and stop the water. Before any wood is touched, trace where it entered: failed caulking, missing flashing, a sloped step, a clogged drain.
- Remove all the rot. That means cutting back to firm, dry wood, not just the soft part you can see.
- Inspect what’s underneath. Check the sill, subfloor and framing for further damage.
- Rebuild with the right material. Depending on the extent, that’s replacement wood, a spliced section, or a filler rated for exterior use on small areas.
- Install a sill pan or equivalent protection that slopes water out, not in.
- Set the new threshold on a proper bed of sealant, shimmed and fastened so it doesn’t flex.
- Prime and finish all sides, including the cut ends and the bottom edge.
- Seal the joints around the frame and threshold so water sheds away.
Skipping step 1 is the most common reason a repair fails. Skipping step 5 is the second.
How to seal a threshold so it stays dry
Good threshold sealing is mostly about letting water out, not just keeping it from coming in. A few principles:
- A sill pan runs under the full length of the sill and slopes to the exterior. That’s the detail described in Canadian high-performance building guidance on doors and thresholds. The sill is bedded in a continuous sealant bead along the inside edge of the pan, and the front edge is left open or given drainage gaps.
- Air sealing is a separate job. The inside edge of the sill is sealed continuously to the pan and subfloor, and the frame connects to the wall’s air barrier on all four sides.
- Some thresholds are designed to drain. A manufacturer’s threshold catalogue describes a water tray with weep holes that drain out the front, and recommends butyl rubber caulking at the center leg and at each end where the threshold meets the frame.
- Don’t seal shut the places where water is meant to leave. A threshold that can’t drain turns into a bathtub.
- Don’t caulk where the door meets the frame. That joint has to move, and caulk there stops the door from closing properly.
Outside the door, the ground matters as much as the sealant. Meltwater from the step, the landing or the driveway edge should run away from the door. Where a concrete step or pad meets an asphalt driveway, sealing the joint between asphalt and concrete properly helps keep water from collecting at the entry.
If you want more detail on sealant work around the door, our guides on caulking around door thresholds, common door caulking mistakes and choosing a threshold type cover the specifics.
Wood, composite or aluminum: choosing what goes back
The material you choose affects how long the next repair lasts.
- Wood looks good and works with older doors, but it needs a flexible exterior finish and regular upkeep. For exterior wood, finish guides generally point to flexible products such as spar varnish or exterior hardwax oil, since they move with the seasons. Our notes on wood door caulking cover keeping the joints around wood doors sound.
- Aluminum thresholds with a thermal break are common on modern entry doors. They need a sealant bed under the metal so water can’t wick beneath it.
- Fibreglass or composite doors and frames don’t rot, which is why they’re a common choice when a frame has failed. If the frame is gone, replacing the door and frame together can make more sense than rebuilding an old unit.
If a full replacement is the answer, the work includes getting the frame plumb and level, protecting the sill with a pan, and sealing the perimeter to the wall. A standard door and frame swap is usually a one to two day job.
What it costs
We don’t publish fixed prices, because the cost depends on what’s under the threshold. A straight threshold swap and a sill, subfloor and frame repair are very different jobs. For a sense of scale, This Old House puts a basic threshold replacement in the US at about $70 to $100 and around two hours. That’s for a simple swap with sound wood underneath, and it’s a US figure for the part and basic labour. Rot in the subsill or framing changes the job.
What moves the price in the GTA:
- How far the rot extends (threshold only, sill, jamb, subfloor, wall framing).
- Whether the door and frame need replacing.
- Brick, siding or stucco work around the frame.
- Access: a second-storey balcony door is not the same as a ground-level back door.
- Finishing: paint, trim and interior floor repair.
A good quote should name what’s being replaced, what’s being sealed and with what, and what happens if more rot is found once the old threshold is out.
Perspective
We’ve spent 25 years looking at doors that failed in Ontario winters, and the pattern rarely changes. Water sits where two materials meet, the sealant has stopped doing its job, and the wood absorbs it until it gives up. The threshold gets blamed, but it’s usually just where the failure became visible.
That’s why we start with caulking and weather sealing, not wood. If the joints around the door, the threshold and the frame aren’t sealed properly with the right product for our climate, the freeze-thaw cycle opens them up again. A rebuilt sill with tired sealant around it is a repair waiting to fail.
When the rot is already there, we’d rather open it up, see what’s really under the threshold, and tell you plainly what needs to be replaced. We’re fully insured, we explain the options, and we’d rather price the job honestly than patch what won’t hold.
Felix
Protecting the door once it’s fixed
A repaired threshold needs some attention in the years after.
- Check the sealant every fall. Look for cracks, gaps or sealant that has pulled away from the frame, the threshold or the brick.
- Keep the paint or finish intact on any exposed wood, especially the bottom edge of the door.
- Clear snow and ice from the step before it melts against the door.
- Clean weep holes and drainage channels on thresholds that have them.
- Replace worn weatherstripping so the door isn’t letting water or air through at the bottom.
Our guides on caulking for extreme weather and on whether door caulking can protect against flooding explain what sealant can and can’t do at the entry.
Door sealing and replacement with Kettle Contracting
We serve homeowners, landlords, property managers and commercial owners across Oshawa, Whitby, Ajax, Pickering, Bowmanville, Cobourg and the wider GTA. Our door caulking and weather sealing service covers the joints around the threshold, frame and wall, which is where most rot starts. For doors that need replacing, we also handle window and door installation, brick window sill replacement and renovation carpentry, which you can see on our services page.

If you have a soft threshold, a musty smell at the door, or a repair that keeps failing, get in touch through kettlecontracting.com and we’ll take a look at what’s causing it.
FAQ
Can I just fill a rotted door threshold with filler?
Only when the damage is small and isolated, with firm, dry wood around it. Once rot reaches the sill, subfloor or framing, filler hides the problem while the wood keeps rotting. The water source has to be fixed either way.
How do I know if the rot has gone into the sill or subfloor?
Probe the wood with an awl or screwdriver and work outward from the soft area until it feels firm. A moisture meter helps, since readings above 18 percent point to rot. If the floor inside is stained, soft or lifting, assume the damage goes deeper and have the threshold removed to check.
Does a rotted threshold mean I need a new door?
Not always. If the door slab and frame are sound, replacing the threshold and sill area may be enough. If the frame is rotted along its length, has shifted, or the door no longer lines up, replacing the door and frame together usually lasts longer.
Should I caulk the threshold to stop it from rotting?
Caulking helps where the frame meets the wall and where the threshold meets the frame, but water has to be able to drain out from under the threshold. Sealing every edge shut can trap water. Never caulk the joint between the door and the frame, since that stops the door from operating.
How long does a threshold replacement take?
A simple swap on sound wood takes about two hours according to This Old House. A rotten subsill or damaged framing can stretch it to a full day, and a full door and frame replacement is typically one to two days.
Sources
- Signs of Door Rot and Decay
- How To Identify and Repair Rotting Wood, This Old House
- How to Replace a Door Threshold, This Old House
- Door Frame Rot at the Threshold: Repair or Replace?
- Doors, Sliders and Thresholds, Built Right Course
- Weatherstripping and Thresholds Catalog