Most homeowners who invest in exterior insulation expect it to work the moment it goes up. What they don’t realise is that insulation without proper sealing is a system waiting to fail. Unsealed gaps and cracks can cause 30% or more of your heating and cooling to escape, bypassing insulation entirely. The insulation itself isn’t the problem. The missing sealant is. Understanding why exterior insulation needs sealant is the first step toward getting the performance you actually paid for.
Table of Contents
- Key takeaways
- Why exterior insulation needs sealant
- Where sealant is needed on exterior insulation
- Choosing the right sealant for exterior insulation
- Benefits of properly sealed exterior insulation
- Maintaining sealant on exterior insulation
- My take on getting exterior sealing right
- Protect your insulation investment with Kettlecontracting
- FAQ
Key takeaways
| Point | Details |
|---|---|
| Sealant is not optional | Unsealed gaps allow air and moisture to bypass insulation, drastically cutting its effectiveness. |
| Freeze-thaw cycles cause failure | Ontario’s climate shifts cause building materials to expand and contract, cracking rigid sealants over time. |
| Product compatibility matters | Using the wrong sealant on rigid foam or around penetrations can cause chemical degradation and failure. |
| Multiple areas need sealing | Joints, window openings, foundation transitions, and utility penetrations are all vulnerable points. |
| Maintenance extends performance | Regular inspection and re-sealing protects your insulation investment and prevents expensive repairs. |
Why exterior insulation needs sealant
Exterior insulation is only as effective as the system around it. The insulation board itself resists heat transfer through the material, but air doesn’t have to travel through the material. It finds the path of least resistance, and that path is almost always an unsealed joint, gap, or penetration.
This is the core physics problem. Air leakage bypasses conduction entirely, and no R-value rating accounts for it. The effective R-value drops significantly when even small gaps exist at transitions or seams, because moving air carries heat directly in or out of the building. Studies confirm that sealing house wrap joints with tape and sealant improves system performance by roughly 20%.
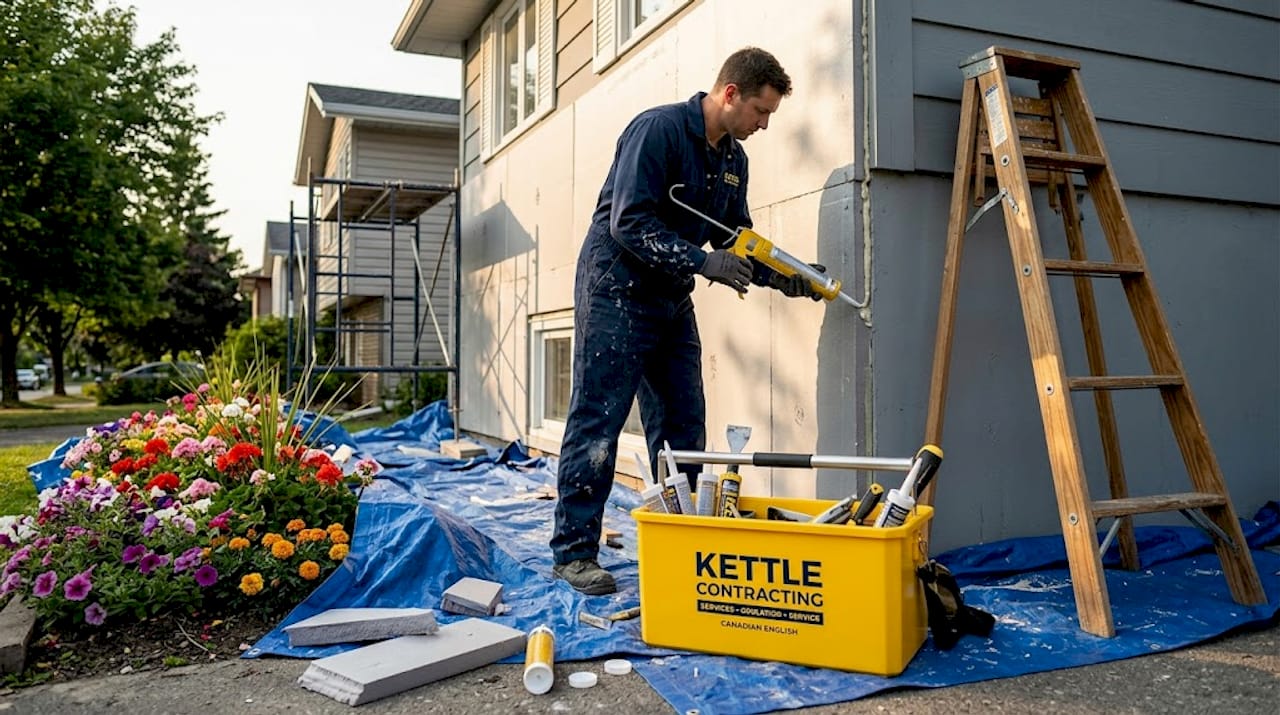
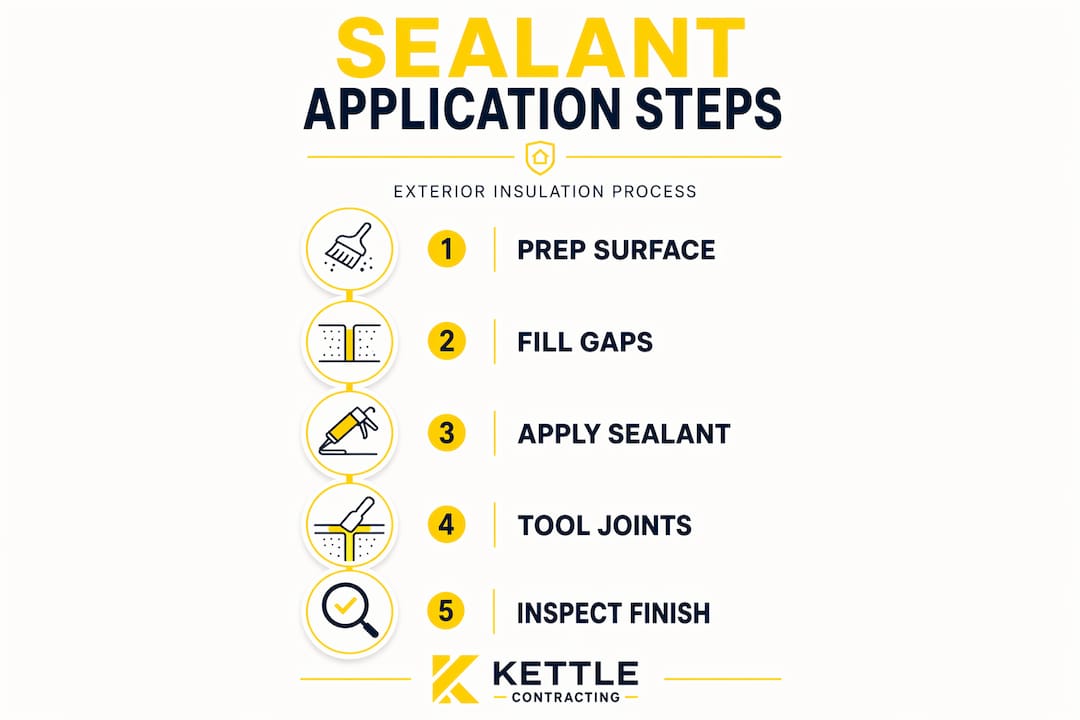
The role of sealant in insulation is to close those paths. Caulk handles surface gaps and joints along flat surfaces. Expanding foam fills irregular voids and works well around pipes, vents, and penetrations. Together, they create a continuous barrier that forces heat to travel through the insulation rather than around it.
Here’s what happens when sealing is skipped or done poorly:
- Air moves freely through gaps at board edges, reducing the insulation’s functional performance
- Moisture follows the same paths, leading to condensation inside wall assemblies
- Pests exploit unsealed penetrations to access the building envelope
- Heating and cooling equipment runs longer to compensate, raising energy bills
The importance of insulation sealant isn’t about adding one more step. It’s about making sure the insulation step you already paid for actually works.
Where sealant is needed on exterior insulation
Knowing where to seal is just as important as knowing why. You can apply excellent products incorrectly and still end up with gaps that let air, water, and pests in. The exterior insulation sealing benefits only materialise when the right locations are addressed.
These are the areas that consistently cause problems:
- Joints and seams between insulation boards. Rigid foam boards butt together, but they never create a perfectly airtight seal. Taping and caulking these joints is non-negotiable.
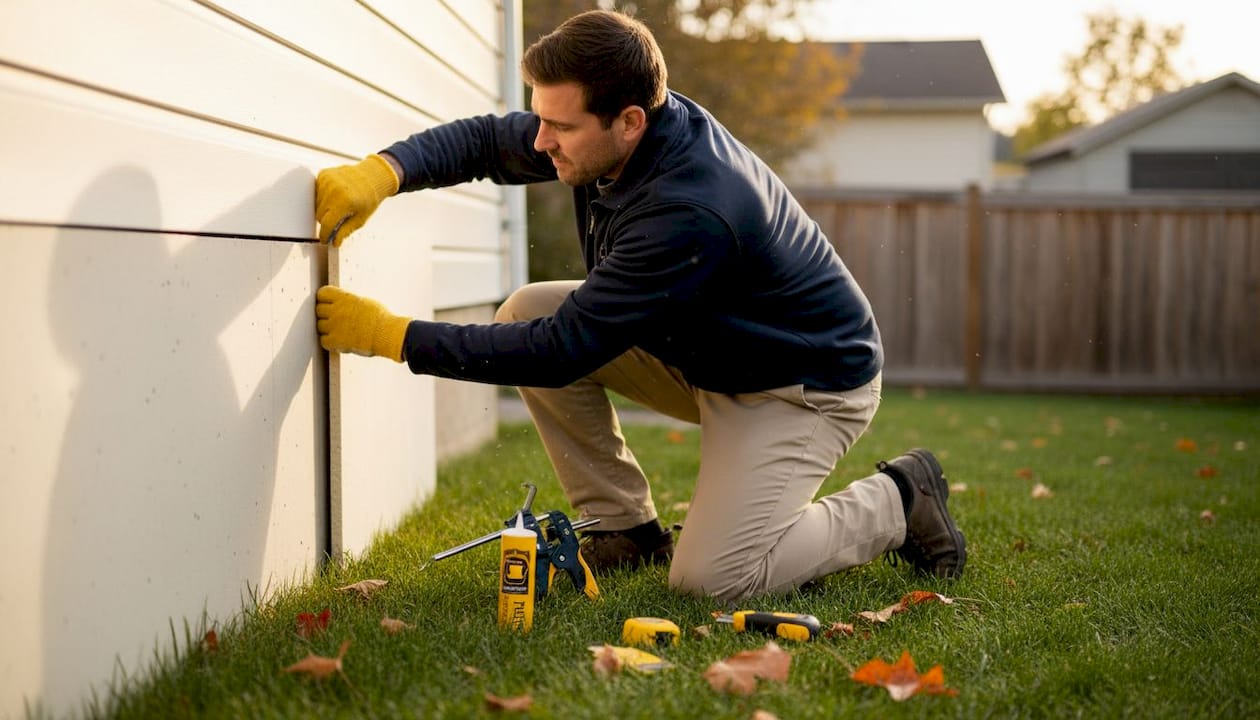
- Window and door rough openings. The transition from the insulation layer to the frame is a common failure point. Sealant here prevents both drafts and water ingress around window and door frames.
- Foundation transitions. Where the insulation meets the foundation or changes plane, gaps can develop. These are particularly prone to moisture and pest entry.
- Utility penetrations. Every pipe, vent, electrical conduit, or gas line that passes through the insulation layer creates a gap. Closed-cell spray foam is the preferred choice at these points because it adheres to irregular surfaces and resists both moisture and pests.
Ontario’s freeze-thaw cycles add another layer of complexity. Building materials expand when warm and contract when cold, and they do this repeatedly across every winter. A rigid, non-flexible sealant applied to an insulation joint will crack under that movement. Building movement from freeze-thaw cycles demands flexible, weather-rated sealants that can move with the building without losing adhesion or airtightness.
Pro Tip: When sealing board seams, use a sealant rated for the specific substrate. Some standard caulks degrade chemically when they contact rigid foam. Always check product compatibility before you apply.
Choosing the right sealant for exterior insulation
Not all sealants perform the same way, and the wrong product can cause the very failures you’re trying to prevent. This is one of the most overlooked aspects of why exterior insulation needs sealant done properly.
| Sealant type | Best use | Key consideration |
|---|---|---|
| Paintable acrylic caulk | Flat joints on cladding or trim | Not suitable for large gaps or areas with significant movement |
| Polyurethane caulk | Board seams, window perimeters | Excellent adhesion and flexibility; stands up to Ontario winters |
| Closed-cell spray foam | Utility penetrations, irregular gaps | Pest-deterring, moisture-resistant, bonds to most substrates |
| Expanding foam (can) | Gaps under 1 inch around framing | Fills voids completely; avoid over-application which can bow framing |
Mixing incompatible products in an exterior insulation system often leads to cracking and water ingress at exactly the points you sealed. The most common mistake is using standard acrylic caulk where closed-cell spray foam is needed, particularly at penetrations or in areas exposed to freeze-thaw movement.
Spray foam insulation offers 20 to 30% energy savings and can last 50 years or more when properly installed. The key phrase is properly installed. That means sealed at every interface and penetration with a compatible product.
For how sealants improve insulation performance over time, durability is the deciding factor. A flexible polyurethane caulk will outlast a rigid acrylic by years in Ontario’s climate. Spend more on the right product once and avoid re-doing the job in three winters.
Pro Tip: At utility penetrations, gaps and cracks foam sealant works well for voids under an inch wide. For anything larger, closed-cell spray foam applied by a professional gives a tighter, more durable result.
Benefits of properly sealed exterior insulation
The exterior insulation sealing benefits go well beyond your energy bill, though that alone is worth the effort. Proper sealing protects the structural integrity of your building in ways that aren’t visible from the outside until something goes wrong.
Moisture is the primary threat. When gaps exist in the insulation assembly, humid interior air can migrate outward and condense inside the wall cavity during cold months. Moisture trapping from improper sealing causes rot, mould growth, and degraded indoor air quality. Mould remediation is expensive. Proper sealing is not.
Pest infiltration is a less-discussed but serious risk. Rodents and carpenter ants actively exploit unsealed gaps in exterior insulation. Once inside the insulation layer, they tunnel through the material and compromise both the thermal and structural performance of the assembly. Pest-grade sealants and closed-cell spray foam at penetrations are the standard defence.
The long-term durability picture is equally compelling:
- Well-sealed insulation assemblies require fewer repairs over their service life
- Continuous air sealing reduces the load on your HVAC system, extending equipment life
- A properly sealed building envelope maintains its performance year after year, rather than degrading gradually
- Sealing joints and penetrations prevents most building envelope failures before they start
Insulation moisture protection isn’t a separate concern from energy efficiency. They are the same concern. Moisture degrades the insulation’s performance and the building’s structure at the same time, and both are prevented by proper sealing.
Maintaining sealant on exterior insulation
Installing good sealant is not a one-time event. Ontario’s climate cycles mean that even well-applied sealants need monitoring and periodic repair. The good news is that a basic inspection routine catches most problems before they become costly.
Here is a practical inspection and maintenance approach for homeowners and property managers:
- Inspect twice a year. Late spring and early autumn are the best times, after the hardest freeze-thaw activity has passed. Look for cracking, separation, or gaps along all sealed joints.
- Check critical zones first. Window and door perimeters, utility penetrations, and board seams are the most likely failure points. Pay close attention to anywhere two different materials meet.
- Test for air movement. On a windy day, hold your hand near sealed joints on the interior. Any noticeable air movement indicates a failure point that needs attention.
- Remove and replace failed sealant fully. Never apply new caulk over old, cracked caulk. Clean the joint, remove the old material, and start fresh with a compatible product.
- Use professional-grade materials. Consumer-grade caulks from a hardware store often lack the flexibility and adhesion ratings of professional products. The difference in longevity is significant.
Proper inspection and ongoing maintenance of exterior sealants is necessary because freeze-thaw cycling and building settlement create gaps over time in even well-sealed systems. The payback periods for sealing upgrades are typically 3 to 7 years, making maintenance a financially sound habit.
Pro Tip: If you’re managing a multi-unit or commercial property, build a sealant inspection into your annual maintenance schedule the same way you would for roof or HVAC checks. It’s far cheaper to re-caulk a joint than to deal with the mould or structural repair that follows a missed failure.
If your windows are part of that inspection, the guide on preparing windows for caulking is worth reading before you start.
My take on getting exterior sealing right
I’ve been doing this work in and around Oshawa for a long time, and I can tell you with confidence that most of the expensive building problems I’ve seen traced back to one thing: someone installed the insulation and skipped the sealing detail.
Not out of laziness, usually. Out of not knowing it mattered. Homeowners assume that because the insulation board is in place, the job is done. It isn’t. I’ve walked into homes where every dollar spent on exterior insulation was being negated by air pouring through unsealed board joints and open penetrations. The furnace was running constantly, and nobody could figure out why.
What I’ve also learned is that Ontario winters are unforgiving to shortcuts. A sealant that looks fine in October can be cracked open by February. I’ve seen standard acrylic caulk at foundation transitions fail after a single freeze-thaw season. The client thought they were done. They weren’t.
The right sealant, applied correctly to the right substrate, lasts. The wrong one gives you a false sense of security and a repair bill in the spring. What I’d tell any homeowner or property manager is this: don’t pick the cheapest product on the shelf. Pick the one rated for the substrate, the movement, and the Ontario climate. And if you’re not sure, ask someone who works with it every day. That’s not a complicated ask, and it saves a lot of grief.
I also know that when a sealant job is done poorly, the most common caulking failures are entirely predictable. The cracks, the lifting edges, the dark staining from water ingress. I’ve fixed all of it. It’s always more work and more cost than just doing it right the first time.
— Felix
Protect your insulation investment with Kettlecontracting

At Kettlecontracting, we’ve spent 25 years sealing building envelopes across the Greater Toronto Area, working through every climate condition Ontario throws at a structure. We know which products hold up through freeze-thaw cycles, where the failure points are before they happen, and how to match the right sealant to each substrate and gap size.
If your exterior insulation has unsealed joints, ageing caulk, or utility penetrations that haven’t been properly addressed, we can help. Our team handles everything from single inspections and targeted re-sealing to full building envelope assessments for residential and commercial properties.
For windows and doors specifically, our window caulking energy savings guide explains how proper perimeter sealing contributes directly to efficiency gains. And if you want to understand what makes a sealant last through years of Ontario winters, our resource on long-lasting caulk science gives you the full picture.
Contact Kettlecontracting to get your exterior insulation sealed the right way, the first time.
FAQ
Why does exterior insulation fail without sealant?
Without sealant, air and moisture move freely through gaps at board seams, penetrations, and transitions. This bypasses the insulation entirely and can account for 30% or more of all heating and cooling loss in a building.
What sealant should I use on exterior insulation boards?
Polyurethane caulk works well for board seams and window perimeters due to its flexibility in freeze-thaw conditions. Closed-cell spray foam is the better choice at utility penetrations and irregular gaps where pest deterrence and moisture resistance are needed.
How often should exterior insulation sealant be inspected?
Inspecting twice a year, in late spring and early autumn, catches most freeze-thaw damage before it progresses. Even well-sealed systems can develop gaps over time from building movement and should be checked regularly.
Can poor sealing cause mould inside walls?
Yes. When air carrying moisture migrates through unsealed gaps and meets cold surfaces inside the wall assembly, condensation forms. Over time this leads to mould growth, rot, and degraded indoor air quality.
Does sealing exterior insulation actually lower energy bills?
It does. Sealing reduces the air leakage that undermines your insulation’s rated R-value. The payback period on sealing upgrades is typically 3 to 7 years, making it one of the more cost-effective improvements you can make to a building envelope.
Recommended
- Is It Better to Use Caulk or Foam Around Windows? | Pros & Cons Explained – Kettle Contracting
- How exterior sealing reduces HVAC load in your GTA home
- How Door Caulking Prevents Heat Loss in Winter | Energy-Saving Guide – Kettle Contracting
- Door Caulking for Extreme Weather | Winter-Proof Your Home – Kettle Contracting
