
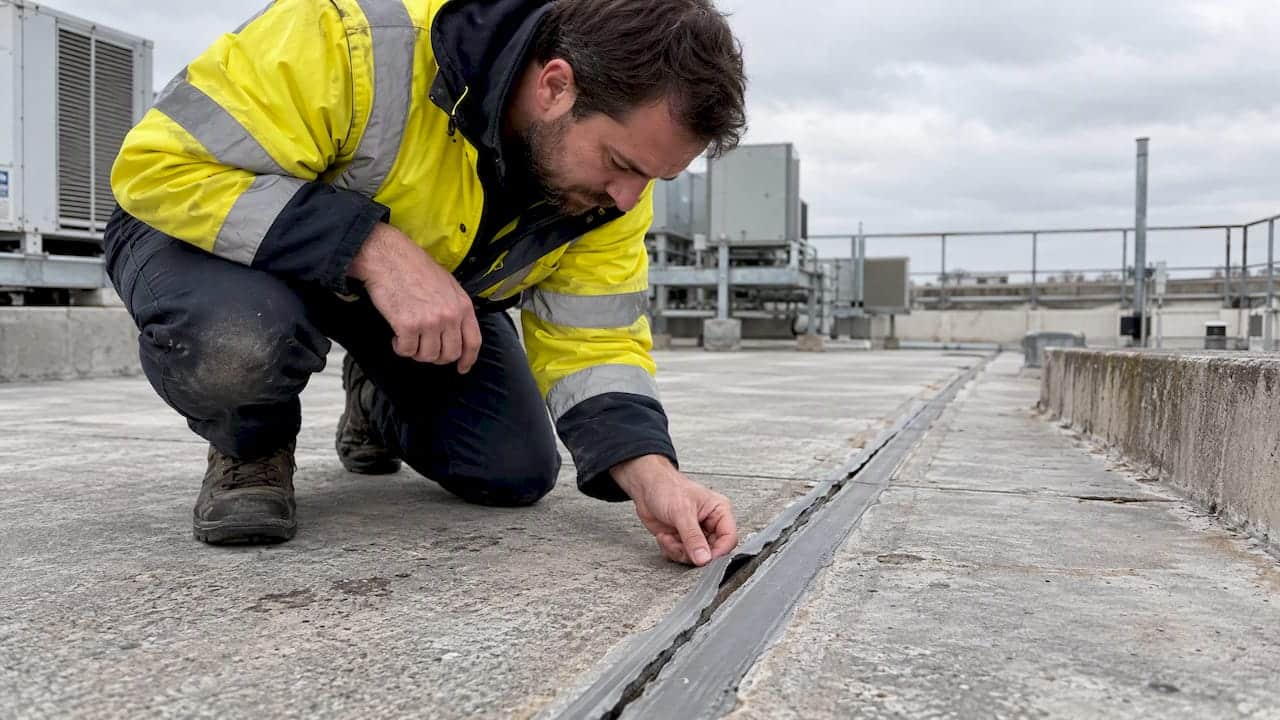
If your expansion joint sealant is pulling away, cracking, or sagging, you’re most likely dealing with either adhesive failure (the sealant has let go of one or both joint walls) or cohesive failure (the sealant itself has torn). The NRC’s guide for sealed joint design notes that most failures tied to design or installation show up within the first two winters. Before you touch anything, photograph the joint, measure its width and depth, check for a backer rod, and note its age.
TL;DR:
- Clean edge separation suggests an adhesion problem; a tear between bonded edges points to excessive movement, aging, or an unsuitable sealant.
- Design or installation failures often emerge within two winters; photograph the joint and record its age, width, depth, and backer rod.
- For cohesive tears, check joint geometry before resealing; a 2:1 width to depth ratio is common guidance, and narrow joints may need enlargement.
- Use closed cell backer rod to prevent three sided adhesion, with self leveling sealant for traffic joints and non sag sealant for vertical joints.
Table of Contents
- Quick diagnostic signs: adhesive vs cohesive failure
- What adhesive and cohesive failures mean, when they show up, and why timing matters
- Root causes to check first
- How to inspect a failed joint and collect the facts a contractor needs
- Practical fixes and long-term prevention
- Field-tested tips from a seasoned caulking expert
- Author perspective: how a contractor approaches lasting sealant repairs
- How a professional sealing service solves repeat failures
- FAQ
- Sources
Quick diagnostic signs: adhesive vs cohesive failure
Figuring out which type of failure you’re looking at tells you a lot about what went wrong and how urgent the fix is. The two types look different up close, and spotting the difference saves you from paying for the wrong repair twice.
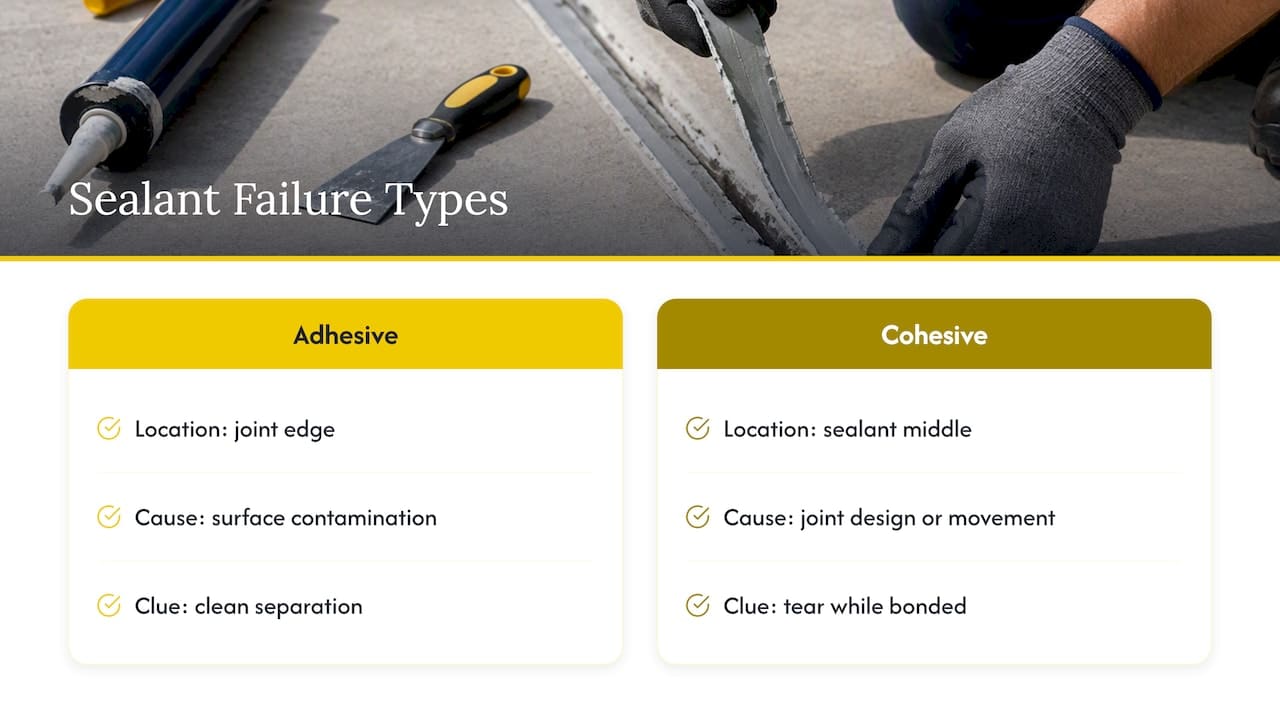
Adhesive failure shows up as a clean separation along one or both edges of the joint. The sealant stays intact as a strip, but it’s no longer bonded to the concrete, brick, or metal it was meant to seal against. You can often slide a putty knife right along the gap.
Cohesive failure looks different. The sealant is still stuck to both walls, but it’s split, torn, or crumbled in the middle. This usually means the joint asked more of the sealant than it could give, typically because of movement beyond its rated capacity.
Other signs worth photographing:
- Puffing or blistering: often a sign the backer rod is outgassing, especially in hot weather after installation.
- Sagging or flowing sealant: common in traffic-bearing joints that weren’t filled with a self-levelling product.
- Discolouration, hardening, or chalking: points to UV degradation or a sealant nearing the end of its service life.
Take wide shots of the full joint run and close-ups of the worst sections. That documentation matters later, whether you’re calling a contractor or filing a warranty claim.
What adhesive and cohesive failures mean, when they show up, and why timing matters
Adhesive failure almost always traces back to the surface the sealant was applied to. Dust, oil, laitance, moisture, or leftover curing compound on the substrate prevents a proper bond, no matter how good the sealant itself is. If the sealant was too thick or too thin for the application method, poor wetting of the joint walls can cause the same result. In short: adhesive failure is a surface problem.
Cohesive failure points somewhere else entirely, usually the joint’s design or the sealant’s fitness for the movement it has to absorb. A joint that’s too narrow for the expected thermal or structural movement puts more strain on the sealant than its chemistry can handle, and it tears. Sealant that has embrittled with age, or that was never rated for the amount of movement in that location, fails the same way.
Timing tells its own story. According to NRC’s research on joint movement, joints with design or workmanship issues often reveal themselves in the first winter, and failures that aren’t obvious in year one frequently show up by the second. A freeze-thaw cycle puts more stress on a joint in a few months than years of stable indoor temperatures ever would, which is why an Ontario winter is often the real test a new installation has to pass.
Root causes to check first
Most expansion joint sealant failures trace back to one of five issues. Walking through each one on-site gives you a clear sense of whether you’re looking at a design flaw, a material mismatch, or a workmanship error.
- Joint design: the joint needs to be wide enough to handle its expected movement, with a width-to-depth ratio that lets the sealant flex without tearing. A joint that’s too narrow can’t be fixed by packing in more sealant; it usually needs to be enlarged.
- Material selection: the sealant chemistry has to match the anticipated movement range. Field studies on sealant performance found that lab test results don’t always predict how a sealant will hold up outdoors, which is part of why product selection on paper isn’t the whole story.
- Surface preparation: contamination, trapped moisture, or leftover curing compound residue all interfere with adhesion. Overheating the substrate during prep, often from aggressive torching to dry a joint, can also damage it before the sealant ever goes in.
- Backer rod and three-sided adhesion: a closed-cell backer rod needs to be sized correctly and set at the right depth. Skip it, or use the wrong type, and the sealant bonds to the back of the joint as well as the sides, a condition called three-sided adhesion that tears the sealant apart the moment the joint moves.
- Installation timing: applying sealant to a substrate that’s too cold, too wet, or outside the product’s rated temperature range weakens the initial bond and shortens the joint’s working life.
Pro Tip: If a joint fails again within a year of resealing, stop and measure it properly before applying anything else. Repeated failures almost always mean the root cause was never addressed the first time.
How to inspect a failed joint and collect the facts a contractor needs
A thorough inspection before you call anyone saves time and often saves money, since a contractor can quote more accurately with real measurements in hand.
- Photograph the full run and the worst spots. Note the joint’s exposure: does it see de-icing salt, vehicle traffic, or direct freeze-thaw cycling?
- Measure width and depth at several points along the joint, not just one. Record the joint’s approximate age and whether it’s been resealed before.
- Check the backer rod. Is it present, and does it look like the right type and size? Gently probe the sealant to see whether it debonds cleanly (adhesive failure) or tears (cohesive failure).
- Flag anything beyond the sealant itself. Water staining, spalling concrete, or crumbling substrate behind the joint are signs of deeper envelope problems that need a professional look before any resealing happens.
This record, photos, measurements, and notes on exposure, is exactly what a contractor needs to recommend the right fix instead of guessing from a quick site visit.
Practical fixes and long-term prevention
The right repair depends entirely on what kind of failure you’re dealing with, and shortcuts here tend to come back within a year.
For adhesive failure, remove the old sealant back to sound, clean substrate. Prime if the sealant manufacturer calls for it, install a correctly sized backer rod, and reseal with a product rated for that surface and movement range.
For cohesive failure, look at the joint geometry first. Enlarging the joint or switching to a sealant with a higher movement capacity usually solves the underlying problem. A common guideline is a 2:1 width-to-depth ratio, which you can read more about in our guide to why joint width affects sealant performance.
Backer rod matters more than most people expect:
- Use closed-cell foam, not open-cell, so it doesn’t absorb water.
- Choose a size that controls depth and resists three-sided adhesion, a detail covered in our backer rod selection guide.
- Set it at the correct depth before placing sealant, never after.
Sealant chemistry needs to match the joint’s job. Traffic-bearing joints usually call for self-levelling formulations that flow into full contact with the joint walls, while vertical joints need a non-sag, non-self-levelling product. Our page on self-levelling sealant and joint prep walks through when each one applies. No single lab test guarantees field performance, which is why installation quality carries as much weight as the product label.
Pro Tip: Build resealing into your maintenance calendar instead of waiting for visible failure. Inspect exposed joints in freeze-thaw climates as part of regular maintenance, and reseal when their condition calls for it. NRC’s sealed joint research emphasizes routine inspection and resealing.
Field-tested tips from a seasoned caulking expert
Warming a cold joint before installation can improve adhesion, but it has to be done carefully. Overheating damages the substrate and the backer rod underneath it.
If a joint is too narrow, more sealant isn’t the answer. Resizing the joint or rethinking its design is the fix that actually holds.
When a joint keeps failing after repeated resealing, that’s a sign to bring in someone who can measure actual movement and review the original specification, rather than repeating the same patch a third time.
Author perspective: how a contractor approaches lasting sealant repairs
Cosmetic patches rarely hold up through Ontario winters. We’ve seen joints resealed with the wrong backer rod or width-to-depth ratio fail again quickly.
A proper repair starts with measuring movement and checking the joint geometry, not just scraping out old sealant and squeezing in new. Follow-up inspection is part of the job, not an afterthought, because freeze-thaw cycles expose shortcuts that summer weather never would.
— Felix
How a professional sealing service solves repeat failures
Persistent sealant failures almost always mean the diagnosis, not just the repair, needs another look. Our Expansion Joint Sealing service starts with measuring the joint’s movement and checking width-to-depth geometry before any old sealant comes out, so the replacement is sized and specified for the climate it’s facing.

If your failures are showing up in brickwork specifically, our Brick Expansion Joint Resealing work accounts for the masonry-specific movement and material compatibility that general caulking overlooks. When the problem extends beyond isolated joints into broader water infiltration or air leakage, our Building Envelope Sealing service looks at the whole picture instead of chasing individual symptoms. If you’ve found water staining or subfloor dampness while inspecting a failed joint, this guide on protecting subfloors from water damage is worth a read before you close anything up.
Book an inspection and we’ll give you a straight answer on what’s causing the failure and what it’ll take to fix it properly, with materials chosen for the freeze-thaw cycles your building actually sees.
FAQ
How do I fill an expansion joint?
Install a correctly sized closed-cell backer rod at the proper depth first, then apply a sealant rated for the joint’s expected movement over top. Skipping the backer rod risks three-sided adhesion, which tears the sealant apart as the joint moves, according to NRC’s joint movement research.
Should I seal driveway expansion joints?
Yes, sealing driveway expansion joints helps keep water and de-icing salt out of the joint, which reduces freeze-thaw damage to the surrounding concrete. Traffic-bearing joints generally need a self-levelling sealant so it flows into full contact with the joint walls instead of sagging.
What is the best sealant for concrete expansion joints?
The right sealant depends on the joint’s exposure and expected movement rather than one universal product. Self-levelling formulations suit traffic-bearing horizontal joints, while non-sag formulations are built for vertical joints, and field studies found that lab ratings alone don’t guarantee how a sealant performs outdoors.
What is a joint sealant in construction?
A joint sealant is a flexible material installed into a gap between two building sections to block water and air while allowing the sections to expand and contract independently. Its performance depends as much on correct joint sizing and installation as on the sealant product itself.
How often should expansion joint sealant be replaced?
In locations exposed to weather and freeze-thaw cycling, routine inspection and resealing when needed help catch failures before they lead to water infiltration. NRC’s sealed joint guidance recommends regular maintenance. Joints in sheltered or low-movement locations may last longer between reseals.
